Monday, August 23, 2010

Funky Fabric = Funky Skirt

I recently brought home a funky fabric from Fabrix. This piece is a rather heavy, crinkled, stretch cotton, black-and-grey, plaid. The plaid has a silver metallic thread shot through. On one side of the plaid, the fabric has been overprinted with a sort of faux-camouflage design. The kinda-sorta camo print is dark gray and cream and, where present, makes the fabric difficult to pin.

Plain plaid on the left, reverse side of fabric (with the kinda-sorta camouflage overprint) on the right.

The kinda-sorta camo print seemed odd to me, but I liked the reverse side of the fabric, even though I am not a big fan of metallic in my plaids. You see, I remember all too well back when I worked retail in the early 80s and I wore those oversized plaid shirts with metallic threads shot through - it was quite the fashion - you would roll the sleeves up and then hold them in place with a button tab. I had to shake off the memory - I decided that the fabric was neat enough that I could live with the silver thread. :)

But what to do with this fabric? I couldn't see it as a top. I couldn't see it as pants. I couldn't see it as a jacket. I washed it and tossed it onto my bed, where I keep other fabrics with which I am communing...

Then, one night I had horrible insomnia and during those hours of trying to sleep it came to me. The fabric wanted to be a funky skirt! It might have occurred to me sooner, except I haven't been wearing skirts for the last several months. For me, skirts are more of a fall/winter garment, worn with boots, or tights/leggings.

This skirt is inspired by a RTW skirt I saw about a year ago. I was lucky that I had bought 3.5 yards of this fabric (it's fairly wide) because I had requested 3 yards and was asked by the clerk if I wanted the last half yard. Good thing I said yes, because this skirt used pretty much all of it.

Self-Stitched-September is getting very close, so I really need to buckle down and make those jeans I have planned. Do I have enough discipline? We shall see. I don't actually wear jeans all that much anyway, so I guess it isn't the end of the world if I don't get them made. ;)

Sunday, August 15, 2010

Technique -- Bias Fringe

Earlier today, I blogged about my latest jacket, and how I inserted self bias fringe into some of the seams. I volunteered to make a tutorial if anyone was interested. Gwen was interested, so here you go, Gwen. :)

Materials:

  • Silk organza, cut into 1" bias strips and a little longer than the seam. The organza is inserted into the seam and, for me, a 1" piece of organza created a width of about 3/8", so if you want a wider width, cut your organza wider.
  • Fashion fabric, cut into 1-1/2" bias strips, also a bit longer than you need. I made a separate strip for each of the six seams I was embellishing.

Instructions for sewing a strip:

  • Iron the 1-1/2" bias strip of the fashion fabric in half, the long way. This crease becomes the stitching line.
  • Center the bias organza strip over the bias fashion strip and machine stitch along the crease.
  • Bring the edges of the fashion fabric together, so the raw edges meet.
  • Likewise, bring the edges of the organza together, so the raw edges meet. You have re-folded the fabric along the line of stitching.
  • Iron the strip. The fashion fabric layer is now doubled, as is the organza layer.
  • Zigzag along the previous stitching line. This anchors everything and keeps it flat. The organza edge is inserted into the seam and, because silk organza was used, it creates minimal bulk.

Instructions for fringing a strip:

  • Separate the fashion fabric layers - you will be fringing one layer at a time.
  • Start unraveling the fabric, using an awl, or the back (non-cutting edge) of a seam ripper - a sharp tool of some kind.

  • Once the first edge is unraveled, do the same on the other edge. At this point, you will have fibers that go every which way.

  • Spend some time orienting the fibers to the correct direction. It can help to use a comb to "groom" them.

At this point, there will be errant fibers that are too long. I gently trim these after sewing the strips into the garment.

Vogue 1036 - Sandra Betzina Jacket

I love fringe. Whenever I have a fabric that ravels nicely, I want to incorporate fringe into the finished garment. I can't help myself. I hear that fringe may be "out of style", but... pfffft to that. :)

Last fall I attended a local BABES meeting and a very experienced sewist passed around a sample of bias fringe. I had never heard of bias fringe, but it produces a very thick, lush trim. I was quite taken with the sample and planned to one day use bias fringe in a project. When I bought this fabric at Fabrix, I immediately saw it's fringing potential and decided to make this Sandra Betzina "jeans" jacket, using the red plaid and incorporate fringe. I made two fringe samples, using standard fringe and then bias fringe – the lush bias fringe was the clear winner.

This SB jacket has the most amazing sleeves - the pattern is worth owning for the sleeves alone. They are pieced at the bottom and gently flare out. Because this fabric is a plaid, I placed several pattern pieces on the bias. I did match the plaid elsewhere, but this made the process a bit easier and added some visual interest.

Auditioning the fringe samples: bias on the left and standard (double layered) on the right.

Fabric:

  • The main fabric is a red plaid rayon blend from Fabrix for $3.99 a yard. I cut the side fronts, back fronts, the collar, and one of the sleeve pieces on the bias. I fused interfacing to the bias pieces, as well as the front facings, back neck facing, and collar.
  • The lining is a poly silky from Fabrix. I purchased three red prints (at $3.99 a yard) that would work as a lining and I had a heck of a time choosing between them. After some difficult deliberation, I cut into my favorite of the three - a scarf print. I fussy cut the fabric using the scarf borders. As pretty as this fabric is, it's one of those nasty wobbly, ravelly, synthetic fabrics to sew. Luckily a lining has minimal finishing, so it wasn't too bad.

    My three lining choices

    And the winner is...

  • The shaped sleeve heads were made from Pellon fleece.

This form of fringe is rather labor intensive. If there is interest, I can post a separate tutorial on how to make it.

It took me several days to make the fringe for the jacket. You can see all six strips here. The strip in front has not yet been "groomed" and none of the strips have been trimmed. I lightly trimmed them after they were sewn into the jacket.

Alterations and modifications:

  • Before making a muslin, I did a 2" princess FBA in the side front panel (using Fit for Real People). The remaining alterations were post muslin, which was made from an old flannel sheet with some impressive holes that I had to cut around. My DD must sleep with an unsheethed exacto knife, or something. :)
  • Eliminated the waistband. The picture on the pattern doesn't show it, but the waistband is shaped and the shaping did not work on my body. It might work well for someone with a smaller waist and larger hips – more of a pear shape. Rather than re-draft it for my figure, I left off the waistband and lengthened the jacket – about 5" at CB tapered to 2" at CF to create a straight hem.
  • Shortened the sleeve 1".
  • Inserted bias fringe in the sleeve (between the upper and lower sleeve), and front and back princess seams.

    The almost-finished sleeves. (The hems are pinned from the inside and at least one pin is showing on the bottom right.)

  • I sewed the side seams last, in order to add shaping at the last minute. I did end up taking it in a couple inches at the waist and hip.
  • Pocket: The pocket was definitely pesky. First, I redrafted the same style of pocket as you see on the original pattern, ending it at the bottom of the jacket (just above the hem). However, I cut a size F (one of the larger sizes) and then I widened the side panel another 2" for the FBA, so the pocket ended up being so wide that it looked more like a "trench" than a pocket. This was no good. For my second attempt I drafted up a standard patch pocket, intending to put fringe at the top, and it didn't look right either, with or without the fringe. Finally, I ended up drafting a lined patch pocket that had the opening at an angle, sort of a hybrid between the first two pockets.
  • Collar: At first I was going to leave off the collar, then I started thinking about the advice that women "of a certain age" look better with a collar. My next plan was to construct the collar using Louise Cutting's "boomerang" technique to eliminate bulk at the CF. (Nancy Zieman calls it the Express Collar.) I redrafted the collar, only to realize I did not have enough fabric for the resulting "boomerang" pattern piece. I ended up using the original collar pattern, and cut it out on the bias, which best fit the fabric that was remaining after all the bias strips were cut for the fringe.
  • I added sleeve heads, as well as thin shoulder pads. I usually use rectangular muslin/fleece sleeve heads, but this time I used the instructions in Professional Sewing Techniques for Designers (pp. 389-390) to make shaped sleeve heads out of fleece.
  • Lining: Though I shortened the sleeves 1" on the body, I left the sleeve lining alone. I prefer to have a pleat at the hem of the sleeve, but the pattern is designed without a pleat, so that extra 1" provided a pleat. The pattern had no pleat in the lining at CB, so I added a 1" pleat for wearing ease.

    The finished lining. I heart this print. :)

    The lining sewn into the jacket.

Worn unbuttoned.

Close up.

The back. I am wearing this with my beloved Marcy Tilton (V8397) ponte pants and a black, button down Vogue top with polka dots, which you can catch a small glimpse of in the close up photo.

Edited to add: I created a short tutorial on how to create the bias trim.

Vogue 1036

Thursday, August 12, 2010

Still Here, Still Sewing! (and Self-Stitched-September)

It feels like it's been ages since I've posted any new garments. I took DD and friend to ComicCon, then I got a bit distracted with my new Kindle and started reading obsessively. Finally, I was able to put the Kindle down and started working on two jackets. Hopefully in the next few days I will have the first one ready to show. The second one, a very easy unstructured piece, is half done, and the first, a structured Sandra Betzina, needs only the lining.

Have you heard of Self-Stitched-September? First, there was Me-Made-May, where folks committed to wearing items they made themselves every day for the month of May 2010. I learned of Me-Made-May on May 1st, exactly, so I observed others who participated, but didn't even think about attempting it myself.

At the end of May, Self-Stitched-September was announced. At first, I didn't think I wanted to join, largely because I had no way of taking photos of myself and my kids are rarely around to take photos.

But I kept thinking about it. I solved the problem of taking my own photos, by purchasing a $12 remote for my Canon Digital Rebel and I located a tripod. I realized that I was looking forward to SSS, so here we go:

I, Shams of http://communingwithfabric.blogspot.com, sign up as a participant of Self-Stitched-September. I endeavor to wear only handmade* item(s) of clothing every day for the duration of September 2010.

*With the exception of shoes, hosiery, accessories, underwear, and the odd tank top. ;)

Thursday, July 29, 2010

Fun with Eye Color

The same photo, with different cropping. I see DD2!

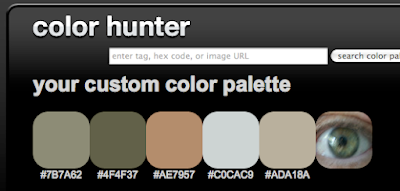
This is a fun exercise! I got the idea from Janis, who uploaded a close-up of her eye to colorhunter.com, in order to break down the dominant colors in her eye. The theory being, of course, that our eye color is a flattering color for us to wear.

I asked DD2 to take an up-close photo of my eye. I cropped the same photo twice, one with more skin showing than the other. I ran both versions through colorhunter.com and also through DeGrave.com.

I think I need to buy more green fabric! ;)

colorhunter.com, maximum crop

degraeve.com, maximum crop

colorhunter.com, less cropped

degraeve.com, less cropped

Wanna know something weird? I am the only green-eyed person in my family, including all extended family members living when I was a child. Everyone has blue eyes, except me. My sister used to tell me it was proof that I wasn't a legitimate member of the family. ;) Even both of my kids have blue eyes!

I haven't done any sewing since returning from San Diego. It's been all work during the day, and vegging out at night with the Kindle that DD1 gave me for a belated birthday gift.

Shams needs to get back to sewing. ;)

Saturday, July 24, 2010

San Diego - Day 2 - More Reviews!

Today is our second, and final, full day in San Diego. Comic Con 2010 ends tomorrow afternoon, but we leave in the morning. I am eager to get the 8 hour drive behind me and to return to my sewing machine.

After depositing the Teen Units at the San Diego Convention Center this morning at 7am (the Male Teen Unit insists on an early start and the convention center is 30 minutes from our hotel, so we leave at 6:30am), I headed for La Jolla. I was trying to remember the last time I have been to La Jolla. I am pretty sure, upon reflection, that it's been...well, never. I thought I had been there, but really, I can't remember ever visiting and none of it felt familiar. I've certainly been aware of it, so does that count? :)

Now that I have been there, La Jolla reminds me of a smaller version of Carmel by the Sea. I have been there, several times, most recently maybe 18 or 19 years ago. (If you get the impression that I stopped going out after having kids, you'd be right.)

The town of La Jolla is perched dramatically above the coast, with beautiful ocean views, and is a fairly well heeled community, with loads of tourists descending in the summer. Like most Pacific coastal cities, such as San Francisco, Carmel, and Santa Cruz, the weather is often gray and overcast, especially in the summer. It was like that today, though the temperature was a pleasant 70 degrees. But I wasn't particularly inspired to take gray "scenic" photos.

Because I arrived before most of the shops were open, I walked around the town, looking in the windows, and capturing a few photos of garments that appealed to me. For example, look at the draping on this golden goddess-dress. How amazing would that be as a wedding dress? (Sorry for the quality of the photos, but the lighting, reflections, and the windows made it a bit of a challenge.)

I love how the fabric is used in this polka dot dress. I have fabric just like this from FabricMart. Of course, I can't wear this particular style – I have been ruminating on just how to use such an interesting piece.

The same store (I think it was called Georgio's) also had this polka dot dress in the window. No, it wouldn't work for me, but if I were younger, thinner, with small perky breasts, I would don this (and the previous two dresses) in a heartbeat!

Finally, the shops started opening up and I headed straight for Pomegranate. I discovered this shop by googling "La Jolla babette blanque", which are two brands I like and, voila, out it popped.

I must have been the first person to walk in today and I was greeted warmly by the sales clerk, Irene. I had read that the employees at this store were not friendly, but that was not my experience. They were having a sale on their summer clothing, but had already started receiving fall items. For an hour or so, Irene and I admired the unusual fabrics and interesting details in some of these garments.

See the white top in the window (on the far left) – it's difficult to make it out, but I was curious about the print, which had lots of black lines and large-print labels with numbers like 46, 48, etc. Irene said they couldn't figure out what the print was supposed to represent, but they had noticed that the numbers were all even. On closer examination, I realized that the print shows the line drawings of pattern layouts, for different European sizes (46, 48, etc). I loved that fabric!

I tried on several garments and found two that I really liked, but not well enough to break my budget. I definitely recommend visiting this boutique, but if a trip to La Jolla is not in your future, you can see a sample of the garments they carry on their website.

About then, I was starting to worry about my parking situation. In La Jolla, as in San Diego, vigilant meter maids are always ready to enforce the 2-hour parking that you find throughout the town, and I had parked quite far away from the shop. I heard that parking tickets are very expensive in this area, and I wasn't interested in finding out how expensive.

However, there was one other La Jolla shop I wanted to check out, Jane's Fabriques, on Girard Street. It was on the way to my car, and I figured I probably had a ticket already, so I popped in for a quick peek. I had read that this store had fabrics that would appeal to the St John's crowd, so I was interested to see their offerings.


Immediately upon entering my eyes fell on a polka dot fabric that I had to have. It's a cotton silk blend, rather sheer, and I'm not sure if it's a chiffon or a voile. It feels a bit like both. It's a border print, but on both selvedges, which makes it a bit trickier to visualize, at least for me. I have no idea how to use it, but I secured three yards. I also loved a silk chiffon "travel" print, but it did not come home with me. The fabric budget must be respected.

The silk/cotton double-border-printed voile/chiffon.

They had an entire wall of cotton batiks, and a few rayon batiks on a rounder. They had quality wools, boucles, and silks, which I did not examine closely. The shop is definitely worth checking out.

By this time, I really needed to get back to my car, but my keys were nowhere to be found. The sales clerk helped me look and they were finally found on the bathroom floor – the non-public, employee bathroom that they kindly let me use. Thanks to the helpful clerk who helped me look for my keys! (I'm sorry I forgot to ask your name.)

I was starting to droop (the last few days were catching up with me), so I decided it was time to leave La Jolla behind, grateful that I did not get one of the legendary parking tickets.

A friend in the Bay Area had asked me to pick up a few Kwik Sew patterns at 40% off, so I headed for the Yardage Town closest to La Jolla. It turns out that the Madison Square Yardage Town, on Clairemont Mesa Blvd, is the 2nd biggest YT after the warehouse store in National City, and it's only 7.5 miles from the fabric store in La Jolla. I was impressed by how clean it was, how well stocked, and well organized. (I was a bit less impressed by the customer service.) Such a huge improvement over your average Joann's. After talking to the clerk there, I realized that I had really missed out at the National City Yardage Town yesterday. They have a basement, a huge basement, with rooms dedicated to various trims, and much more fabric, and I had missed it completely. Oops.

Yelp had mentioned that there was a great vegetarian restaurant in the same shopping strip as Yardage Town, so I had a late, and very yummy, lunch at Sipz. My Spicy Basil "chicken" with vegetables and brown rice did not disappoint.

It was only early afternoon, but I was done. As in, no more energy left, and I returned to the hotel for a long nap. Therefore, a shorter report today...

You're welcome. :)

The hotel gardens.

San Diego - "The Spirit of Cloth" review and more!

I'm in San Diego for a few days while DD2 and her friend (hereafter known as the Teen Units) enjoy Comic Con 2010. I've been seeking out textile shops and worthwhile clothing boutiques to pass the time. San Diego doesn't seem to have as many "must see" textile-related destinations as one might hope for in a large metropolitan area, but I have managed to find some worthwhile spots to visit.

I dropped the Teen Units at the San Diego Convention Center at 7am today, so I had some time to kill before most businesses opened up. After breakfast at iHop (where I ate, just to say I did), a little trip to Walmart, and an aborted trip to Joanns, where the two employees left the store three minutes before it was to open and hadn't returned several minutes after it was supposed to open (so I left), I started by visiting the Yardage Town Warehouse in National City, which, conveniently, opens at 9am on weekdays.

The outside of Yardage Town, located in an older strip mall, is not impressive. But when I walked inside, it was as if I had been transported 30 or 40 years back to the old New York Fabrics chain of my youth. Inside is a large room, a really large room, filled with... wait for it... FABRIC. Fabric on the walls, fabric on round islands, fabric on flat fold tables, home dec fabrics on giant rollers. I hadn't realized how much I missed a giant room full of fabric to explore. They also carry the big 4 patterns, as well as Kwik Sew, all at 40% off. I picked up several KS patterns I've been eyeing. While I'm not saying that you will find cutting edge fabrics at YT, or luxurious, decadent fabrics, they have some nice selections and I picked up a few pieces, on sale. I found the sales staff to be very nice and helpful, and those I dealt with, know how to sew and are interested in sewing, which is always refreshing.

After a lengthy visit to Yardage Town, I set the GPS in my car to the Old Town of San Diego. Old Town is the historic part of San Diego, a tourist destination full of shops, restaurants, and the odd mariachi band. A friend had told me about the fabric store, The Spirit of Cloth and I wanted to check it out.

Sally Hickerson, in front of her fabric store in Old Town, The Spirit of Cloth

Ensconced between two really nice bead stores on Juan St, The Spirit of Cloth is a small, but well appointed fabric store owned and run by Sally Hickerson. Many sewists know Sally as the former owner (for 25 years) of the well loved independent fabric store, Waechter's Silk Shop in Asheville, North Carolina. I've never had the pleasure of visiting Waechter's, but I know several sewists through Stitcher's Guild who have frequented that shop for years. Sally opened The Spirit of Cloth about a year ago, and it's a jewel.

It's not a large store, but you see beautiful fabrics, carefully selected, everywhere you turn. Inspiring sample garments of Diane Ericson patterns, Sewing Workshop patterns, and other independent patterns decorate the room. A wall of great independent patterns, such as La Fred, Kayla Kennington, Loes Hinse, Sewing Workshop, is near the register. She offers classes from time to time on the second floor (over one of the bead stores). I recognized several of her fabrics as those carried by Marcy Tilton, Britex, and some of the nicer offerings from Fabric Mart, and her prices were reasonable. A rack of antique kimonos, and pieces of kimono fabrics are for sale.

I had never met Sally before, but we had great fun chatting and I bought one piece of beautiful striped cotton (destined to become a SW Hibiscus top) and a single gorgeous button. I could have easily picked up some of her Tencel denim, or her Ikat denim, or her beautiful striped rayon, but I was feeling the need to watch the fabric budget... for now. I may be phoning her later to pick up a piece or two. Heck, if I lived closer, I'd be there all the time. I might even work there occasionally. :)

Me in Fabric Heaven! Don't I look at home amongst the silks from Vietnam? I'm wearing my test Plaza jacket, over a Mimosa top. Not shown are my cream linen/silk/rayon Trio pants. Hanging from the ceiling is a sample Plaza jacket made from a sheer fabric.

After visiting Sally, and getting many recommendations for places to see in Old Town, places to eat, and other places to visit in the San Diego area, I left to pursue her suggestions. Old Town is a nice place to explore, so I wandered around for awhile, enjoying the beautiful day. (Did I mention at home it's been in the 50s, chilly and cold? San Diego has been in the 70s - very nice!)

Scenes from Old Town

Next, I set my GPS to Little Italy, near the Convention Center.

Sally had told me about Carol Gardyne's Boutique. Carol does gorgeous fabric painting, and she also sells beautiful, Paris-inspired clothing with interesting silhouettes and made from beautiful fabrics. Given that the best I could find was a 15-minute meter for my van, I didn't have long to check out her boutique, but she did have some beautiful pieces, including some attractive, reasonably priced jewelry, and her silk painting is gorgeous.

After a quick dinner at Landini's Pizzeria, and buying some Canoli and Chocolate Dipped Strawberries from the bakery deli at Trattoria Fantastica for the Teen Units (another recommendation of Sally's), it was time to pick up the two exhausted Comic Con-ners and head back to the hotel.

All in all, a great day. :)