Pages

Wednesday, June 29, 2016

Tutorial: Sewing a Binding with a Zipper


In my last post I showed a cardigan-style jacket that I made using a novelty pleather fabric. Because the fabric was largely see-through, I didn't want facings. I wanted to finish the edge with a binding. I also wanted a zipper.

It took me awhile to noodle out how to do both.

Once I figured it out, the solution seemed so obvious. Isn't that often the way?

I said I would write a tutorial on how I did it, when a comment made me wonder if the instructions that come with the pattern, Burda 7183, already tell you how to do this! I never even unfolded the instruction sheet that came with the pattern. Why? Because I just didn't need to. I used 3 pattern pieces (front, back, sleeve)—who needs instructions for that?!

Last night I opened up the instruction sheet and my technique is not the same as theirs, so here is my tutorial.

Preparation

I wanted the zipper to be installed first, before the neck or hem bindings. This way the top and bottom of the zipper are finished by those bindings. You can do it the other way, of course.

I first sewed the back shoulder and bust darts, then I sewed the shoulder and side seams. You can then attach the zipper and bindings, or you can insert the sleeves first. Whatever works for you, though I like to finish the neck edge as soon as possible. Before binding the neck, I handle the garment very carefully to avoid distortion—never letting the neck edge "carry" the weight of the jacket and minimizing any try-ons. I rarely stay stitch and, in this case, I doubt it would have effectively stabilized the cut netting.

Trim your neckline edge. The pattern includes 5/8" seam allowances, but I sew a 1/4" seam when binding, so I cut away 3/8" from the neckline seam. I carefully positioned the hems and sleeves so that they ended on a pleather strip, so I didn't trim those. In this case, just make sure that the pattern is already adjusted to your desired length.

Step 1: Cut binding strips

Using your binding fabric (I used a stretch bengaline), cut 4 strips, on the straight-of-grain. I attach the binding with 1/4" seam allowances, and I wanted a half inch binding, so I cut my strips 1" wide. Cut them longer than you need - you can trim them later.

Note: The pic shows 2 strips, but you need two for each side, or 4 total.

Step 2: Apply binding to zipper

You want a neat finish both sides of the finished zipper, so you are encasing the zipper teeth in the binding. Using your zipper foot, stitch the zipper to a binding strip with a 1/4" seam.

Step 3: Apply binding facing to zipper

For this step, pin the 2nd strip to the other side of the zipper, and then sew it with the new strip against the feed dogs. That way you can stitch-in-the-ditch and sew exactly on top of your first line of stitching.

Some folks might encourage you to sew both strips at once, but I find that to be an easy way to create a sloppy seam. I generally like to attach one layer to another, not three or four layers at once. You have much greater control when sewing only two layers at a time.

Step 4: Press and (optionally) topstitch

The pressing is not optional. :) Press the bindings away from the zipper.

The edge stitching is optional, though I like the result.

Half of your zipper is now ready to be installed.

Step 5: Attach zipper to jacket

Open up your zipper sandwich and pin the front side of the zipper to the front of the garment. Note that my binding is inset about 1/8" from the raw edge. This is because I am using 1/4" seams and the pleather strip is 3/8" wide. I want the binding to completely encase the pleather strip. In an ordinary situation, I would not inset the binding.

Machine stitch.

Step 6: Sew the back binding

On the back side, fold under a 1/4" on the raw edge of the binding facing, and pin. I hand sew this edge, but you can machine sew if you like. If you do, I would machine sew from the front to make sure that it looks even from the outside.

Personally, I far prefer the neat look of a hand finish.

Step 7: Repeat on the other side


And that's it! This finish looks nice from both sides. Woot!

Sunday, June 26, 2016

Summer Jacket in Novelty Pleather & More


TOC:


Summer Jacket in Novelty Pleather

Remember last May when I visited Fabric Depot in Portland? I purchased a piece of novelty pleather. Strips of pleather are woven and sewn to a net backing.

I decided that this fabric would make the perfect summer jacket. I started with Burda 7183, a Chanel-style jacket. This pattern is available in size 8-16—the 16 is one size too small for me. I traced off the 16, made some alterations, muslined it, made more alterations, and muslined it again. Two muslins is more than I generally do, but I was very happy with the resulting fit, so it was worth the effort.

Alterations & Modifications

  • added 2" dart in side seam (FBA)
  • made a 3/4" broad back adjustment and removed corresponding excess with back darts in the shoulder seam
  • adjusted shoulder seam forward by 1/2"
  • lengthened back by 3/8"
  • widened bicep by 1-1/4" (The bicep was quite narrow in the original pattern.)
  • straightened front hem
  • narrowed shoulder by 5/8"

I didn't use any facings or a lining, but I wanted to finish the seams and raw edges. I finished the seams with fold-over elastic (FOE).

Attaching the fold-over elastic (FOE)

I combed through my scrap piles and my stash for a fabric to use as binding. I auditioned many fabrics that weren't right. Here are a few of them:

In the end, I chose a stretch bengaline from my stash. I wanted both a binding and a separating zipper, which I ordered from ZipperStop in NYC. (I ordered a custom 20" antique-brass 2-way separating zipper with an antique brass foxtail slider.) It took me a while to noodle out how to do both the binding and the zipper. Stay tuned for a tutorial showing how I did it.

I love the final jacket! I expect to get a lot of wear out of this.

I plan to bring it to NYC this summer!

Burda 7183


Mendocino Getaway

My birthday is in July, but my daughters will be cruising in Europe at that time, so last weekend I took them to Mendocino for an early birthday celebration. Since Mendocino is a 3.5 hour drive north of San Francisco, we spent a couple nights—it's a charming little coastal town that looks very much like Cape Cod. In fact, the television series, Murder She Wrote, was set in Cape Cod but the exteriors were filmed in Mendocino.

My daughters had never been to Mendocino and I hadn't been there in more than 20 years. It was just as beautiful as I remembered, though the food wasn't as good as I remembered. We had breakfast and lunch at Goodlife (meh), dinner at Mendocino Hotel (fine), brunch at MacCallum (fine), and dinner at Frankies (one of the worst meals of my life, though my kids enjoyed their ice cream on another day).

If you've had wonderful (but not necessarily fancy) food in Mendocino, please tell me where!

We stayed in a converted water tower through Airbnb. It had no internet, but I didn't mind. The setting and views were fabulous.

Our converted water tower apartment

Views from the water tower

I treated all three of us to a session in the private hot tub and sauna at Sweetwater Spa, followed by massages. Such luxury!

Sweetwater Spa

A friend of mine lives in the Mendocino area, so we met up. I remember meeting Kathleen when we were four years old—our mothers were best friends. We attended the same grade school, junior high, and high school. My daughters and I enjoyed visiting Kathleen's beautiful home. Later we had brunch with her and her son at MacCallum House.

Kathleen sews, but she's also an amazing artist

MacCallum House

Kathleen and a glimpse of her son, Jade

The massage left my hair oily, so I'm hiding it under my daughter's cap

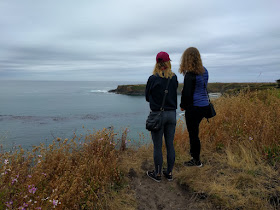
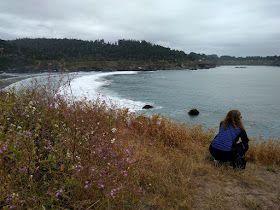
We enjoyed the amazing views.

I had totally forgotten about this grass from my childhood! We called it rattlesnake grass since the tip looks just like the rattles from a rattlesnake. It even rattles when shaken.

Walking along the coast

The shopping in Mendocino was great! There are a variety of little shops selling all sorts of interesting clothes, accessories, and other goodies. I took only a few photos of the shopping...

You can have custom shoes made an Align. The cobbler makes wearable shoes but his helper was wearing these whimsical-but-well-fitting beauties

I bought this front pack for my daughter as a graduation gift.

I liked the pockets on this jacket

We even hit up the Farmer's Market on Saturday

My favorite bit of the weekend was spent enjoying Friday's stunning sunset. It had rained earlier in the day, so the sky also featured a rainbow.

DD1 and I under a rainbow

I love making shadow pictures and we found an obliging rock formation.

From first to last, what a sunset!

The sunset from our water tower

Farewell, Mendocino!
Next time I just might go there all alone. It was so nice to soak in the ambiance (not to mention the hot tub) and catch up on some reading.


Bill Cunningham, RIP

Bill Cunningham passed away yesterday (and here). I loved watching his video vignettes about what people wore in NYC. There is a wonderful movie about his life and work called Bill Cunningham NYC. It used to be available for streaming on Netflix, but it has been removed. You can buy or rent the DVD to learn more about this remarkable man.

I can't imagine NYC fashion without Bill on his bicycle, documenting it.

Rest in peace, Bill.


I have several more projects in flight, including another summer jacket, a pleated skirt, and a project for Britex.

But first, join me on Patti's Visible Monday.

Have a great week!

P.S. I almost forgot! Today's CBS Sunday Morning had two fashion related pieces you should check out!

There was a piece on Outlander, the STARZ show that I blogged about recently. It includes a brief interview of the costume designer, Terry Dresbach.

There was also a piece about fashion-themed museum exhibits. I certainly love those and, this summer, I will be seeing the two that were mentioned in NYC!