Monday, October 7, 2013

#4 - LBD Challenge - Studs Galore!


TOC:

Rules or Challenge 4

Challenge #4 had a fun theme! Here are the rules:

For this challenge, be creative and make a little black dress for your perfect night out.

Create a story for us. Are you going out with your husband on a romantic date or a fun night out with the girls? Where will you be going? What will you be doing? Your dress should be able to tell your story.

You will be judged on creativity, craftsmanship, how the dress tells your story, and fit.

What Is My LBD For?

For this challenge, I have made a dress to wear to the Opening Night of the Fall Antique Show at Fort Mason!

One of San Francisco's most popular social events, it also benefits the Enterprise for High School Students (EHSS), a non-profit career development agency serving San Francisco youth. The opening night is a festival of eating, drinking, music, socializing, of seeing, and of being seen. You can view photos of a past show in 2006.

My Little Black Dress, McCalls 6028, features a slim silhouette and is fitted via front and back princess seams, with a slit in hem the left front princess seam. The front yoke, and the back neckline, are embellished with silver-colored, two-prong studs made from nickel and steel - these strong studs required some effort to install. The back is finished with an exposed zipper.

I am also sharing this with Patti's Visible Monday!

Alterations and Modifications

I started with a size 14 (my usual before FBA). My changes were:

  • Narrowed the shoulder by 5/8".
  • I read on Pattern Review that folks found that the neckline is too high on this dress. I found the same. I lowered the front neck by 1".
  • The bust fullness on the princess seam was too high. I lowered it a couple of inches and widened it about 3/8".
  • Shortened the dress by 2", though only 1-1/2" on the center front panel because of the full bust adjustment to the side front.
  • Added a bit to the waist (in the front only).
  • Removed fullness from the hip all around. (I didn't measure.)
  • Used the hem slit in the left front princess seam.
  • Used the sleeve, but lengthened it by 5".
  • Installed an exposed zipper at center back. It was a YKK zipper I'd bought about a year ago from Zipperstop with a large ring pull. It was shorter than the pattern called for and a separating zipper. But it is not the boss of me. ;)

Studs

While I am not a huge fan of "shiny", such as sequins or patent leather, I am a huge fan of the edgy version of shiny: spikes and studs! I own no less than three pair of spiked and studded shoes and boots and I really enjoy wearing them. (Even though the spiked shoes can be a bit deadly.)

I was in my local bead store several weeks ago buying findings for earrings, and I saw the cutest spikes. I tried to buy a few, just to play with, but they had sold out. They had ordered more, they told me.

The first thing I did when I saw this challenge theme was to call them to ask if the spikes had come in.

Nope.

I was starting to figure out a Plan B, when Margy sent me one of her bookmarked links to an online store called, appropriately, Studs and Spikes, so I checked it out.

I was in love!

Late into Monday I was angsting over choose what to order from their bounty! Finally, very late on Monday, I ordered studs and spikes, along with a basic stud setting kit. I specified 2-day air so that they would arrive on Thursday. (One-day air would have been $45 for this order.) Then, on Tuesday, I thought some more. I thought and thought. It's difficult to buy supplies when you don't *really* know what you are doing.

And I couldn't fully decide what I was doing until I could play with the supplies.

It's a pickle, I tell you.

Around midnight on Tuesday, I made another order. This time only for studs in a different shape and several sizes. Again, I specified 2-day air so that the order would arrive on Friday. (Though, of course, I was hoping it would arrive sooner.)

My first order arrived late Thursday and I got busy with samples. I thought I had figured out my dress design (which I had partially muslined) and fabric, but that was now challenged. I started grabbing bits of other black fabrics in my stash and studding those, too.

I quickly decided that, as cute as they were, I preferred the studs on my dress-weight fabrics. The spikes require a very beefy base, such as a firm leather. (Though I will have fun using them on another project, as they are so cute!)

I'm glad I ordered a lot of extra studs, as it took me awhile to figure out the sort of interfacing I needed, and how to get the studs to line up properly. These studs are made from a fairly rigid metal made from nickel and steel. The prongs require force to bend. Also, once I had interfaced the fabric, it was more difficult to insert the prongs.

What worked best was to use one point from a pair of sharp embroidery scissors to make a small slit for each prong. After inserting the stud into the slits, I turned the fabric over while holding the stud so it wouldn't slip out, laid it out on the table, and used the Stud Prong Press to bend each prong. (The Stud Prong Press is included in the beginning stud kit and looks like a flat screwdriver with an angle in it. It also has a wooden handle, similar to an awl.)

Through trial and error, I discovered that to keep the studs secured to the fabric, that I had to bend each prong all the way in so that it touched the metal on the inside. Bending them flat, parallel to the fabric, was not enough - the stud could easily slide off. (Again, I doubt this would be a problem on a stiffer leather.)

I found it necessary to stand over my workspace in order to get the right angle to exert enough force. When I went to bed late Thursday night, my shoulder (which is weak thanks to long-ago bouts of frozen shoulder) was sore from the practice run. By Saturday, my shoulder was throbbing after spending much of the day attaching studs.

My second order of studs arrived late Friday and, by then, I had run to JoAnn's to buy the McCalls pattern, cut out the yoke, and had started studding.

I had to take frequent breaks, but I loved the result! I am sold on these studs, which are beautifully made. I particularly like the pyramid and cone studs, which have an almost brushed finished. The dome studs are more shiny. (I prefer my metals hammered or brushed, rather than shiny.) Adding the studs to the interfaced fabric gives the yoke a hefty drape.

Here are a few pictures showing my progress:

The front yoke is interfaced with a fusible interfacing and all edges are stay-stitched.

Completed - the front

Completed - the back

Interfacing the back neck

Back neckline completed

Conclusion

This is an excellently drafted pattern and I will use it again. I love the stud detail. It is weighty, but in a good way. This will not be my last project with studs.

I am very happy with this dress! I am sure I will get a lot of wear out of it. Because of the stud detail, I will be hand washing it.

More Pictures

Shake! Shake! Shake!

Shake! Shake! Shake!

Shake my booty!

Pattern

Saturday, October 5, 2013

Next Challenge


Thanks so much for your votes in challenge #3! I have made it to the fourth round in the FabricMart Fabricista Fashion Challenge!

I was sorry to say goodbye to Peggy in round 3. I spoke to Peggy by phone after she learned the news, and she has a great attitude about the experience, though she was already on her third muslin for the LBD when she got the news. She is excited to start up her fall and winter knitting, which she wasn't able to do while competing. I have really enjoyed sewing alongside Peggy and thought she went out on a really high note. Her garments, and especially her coat, were wonderful and completely true to who she is.

On to the next challenge, which is a good one. Here are the rules:

For this challenge, be creative and make a little black dress for your perfect night out.

Create a story for us. Are you going out with your husband on a romantic date or a fun night out with the girls? Where will you be going? What will you be doing? Your dress should be able to tell your story.

You will be judged on creativity, craftsmanship, how the dress tells your story, and fit.
Believe it or not, I have never owned a Little Black Dress!

I still don't.
I got a late start on this one and I haven't even cut it out yet. (I did muslin a pattern that I won't be using, however.)
Maybe my "story" is that I'm going skinny dipping!

Don't expect a post from me on Sunday, and maybe not even Monday, this week.

Wish me luck!

And, because I don't like to leave you empty handed, enjoy this eye candy that I found on Pinterest! (Oh, Pinterest, how do I love thee?)

Monday, September 30, 2013

Please Vote!


Thanks so much for all of your generous feedback on my challenge #3 entry!

The FabricMart vote for this challenge is already up and, WOW, there are some impressive entries this week!

Please go on over, check them out, and vote!

We received our 4th challenge this afternoon. Though, of course, one of us will not be able to enter it into the next round. I am looking forward to this one. I hope I got all of my "dithers" out of my system earlier today so I can get started.

And, because I don't want you to leave here empty handed, enjoy this eye candy that Margy found!

#3 - Bundle Challenge - It's Moto-rific!


Welcome to Challenge #3 in the FabricMart Fabricista Fashion Challenge!

TOC:

Rules for Challenge 3

Challenge #2 was so much fun! Challenge #3 presented a different sort of challenge. Here are the rules:

Using the 6 yard Bundle we have sent you, make a 2 piece garment. What is in the bundle is a mystery and everyone will receive something different. Try to incorporate the three fabrics in some way. You can use fabric from your stash to finish your look, but keep in mind that the bundle fabric must make up a majority of your outfit. You will be judged on creativity, craftsmanship, the way you use your fabrics together, and fit.

Materials

I received the following three fabrics (clicking the pic takes you to the link on the FabricMart site):

  • Gray plaid flannel, 2.5 yards.
  • Black poly/cotton ponte, 2 yards (though it was actually more).
  • Navy soft cotton print with tennis rackets, 1.5 yards.

In addition to these three fabrics, I added a few supplies:

  • Strips of bias silk organza for making the fringe.
  • Fusible tricot interfacing - used only in the back neck facing.
  • Cotton twill tape sewn to the outer edge and the pocket edge.
  • Two keyrings from the local hardware store - used as closures.

Bleaching the Fabric

I was pretty happy with the black ponte (I've sewn with loads of black ponte - it's right in my wheelhouse) and the gray plaid flannel, but the tennis rackets presented a challenge. While the navy tennis racket fabric was very smooth and soft, I didn't like how it looked alongside the homespun grey flannel. It just didn't work for me. I considered various options, including dyeing the tennis racket fabric to black, chopping it up - for example into bias strips, or using it (as is) as lining.

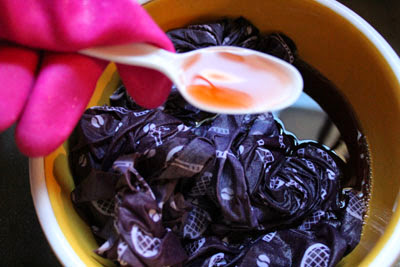
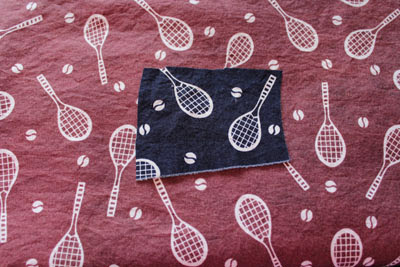
During my musings, I wondered how it might react to bleach. I rarely use bleach, but I had a container of liquid bleach in the laundry room that was very old, and half full. I first immersed a square of the tennis racket fabric in a 50/50 mix of bleach/water for 8 minutes. It lightened to a mauve color. The tennis rackets were still very evident, but the mauve color worked much better with the grey.

Bleaching the yardage.

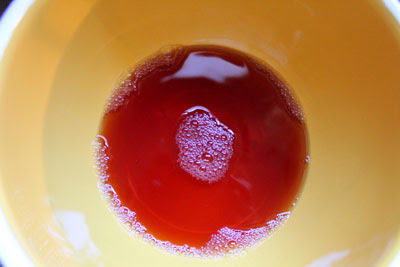
The water turned a berry color.

I used the remaining of the bottle of bleach, mixed with an equal-ish amount of water, on the entire piece of fabric, for 8 minutes. After rinsing, I ran it through a cycle in the washing machine and dryer. I can't say that I love the fabric, but the color feels more harmonious with the grey.

The resulting fabric.

What to do...

We received the 3rd challenge on Monday morning. I spent Monday evening trying to decide what to do with my three fabrics. At first I was thinking of using the black ponte for pants and some sort of top with the grey plaid - I'd even started choosing patterns. After thinking on this for awhile, I decided that it was a fairly predictable way to use the fabrics and I didn't want to be so predictable.

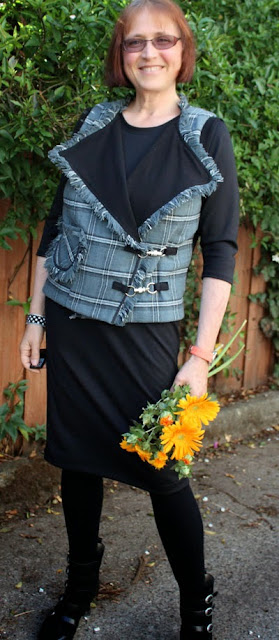
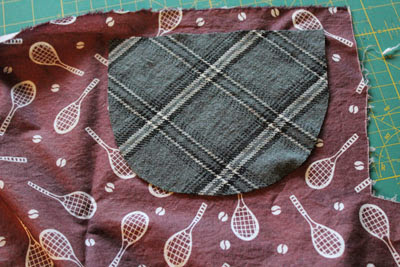
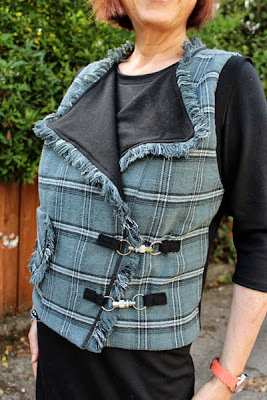
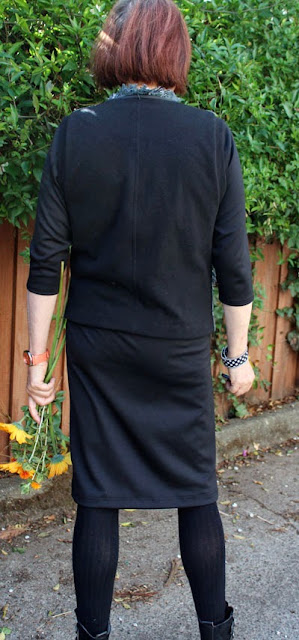
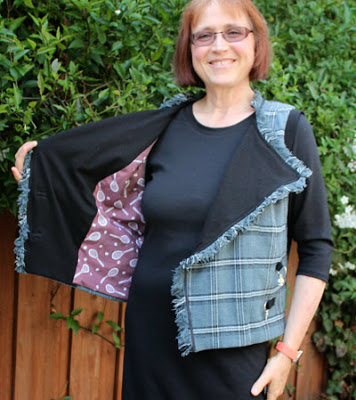
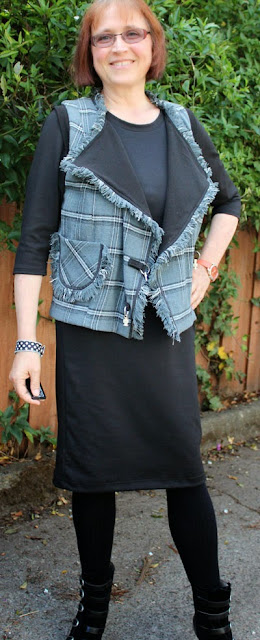
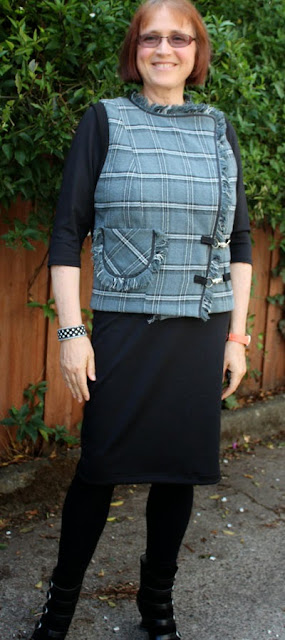
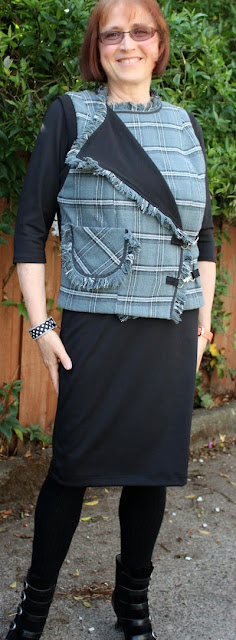
So, it was back to the drawing board. I decided that I wanted to make a moto-style vest and to pair it with a black ponte sheath dress with 3/4 length sleeves. Once this decision was made, I had a lot of fun planning the details of the moto vest, which uses all three fabrics: the plaid is on the front, the pocket, and the back neck facing. The black ponte is the back and the front facings and as the armhole ribbing. The tennis racket fabric lines the shell and the pocket.

Garment #1: Vest

I started with my TnT moto jacket pattern which I first made in July, the Eggplant Pleather Moto Jacket. For this version I made quite a few changes:

  • Left off the sleeves.
  • Omitted the collar.
  • Shortened by 2".
  • Did more fitting, especially through the hips. I took in about 6" at the hips between the side seams and the CB seam.
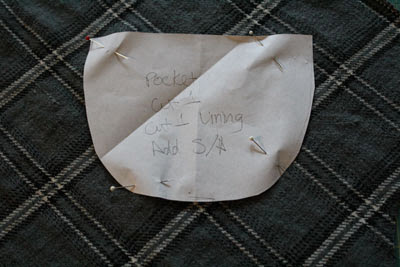
  • Drafted a lined bias pocket.
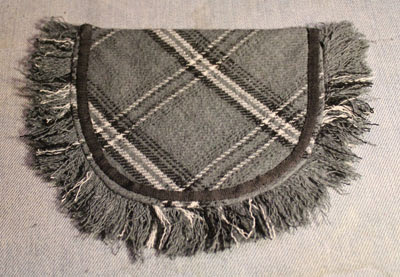
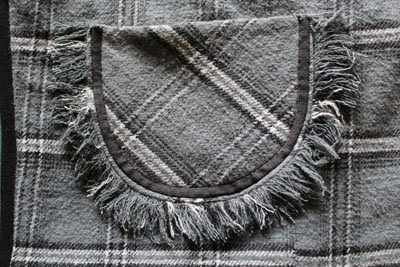
  • Made bias fringe and attached it around the outside edge of the vest. I also used it around the outside edge of the pocket.
  • Hand sewed charcoal grey cotton twill tape around the outside edge of the vest and also around the outside edge of the pocket.
  • Eliminated all zippers and used two keyrings as the closure.
  • Cut back the armholes and finished with a ribbing made from the black ponte.
    Armhole ribbing. I love this technique as the ribbing pulls the armhole in close to the body.

The front of the jacket features princess seams. I wanted to match the plaid, but with a large bust alteration, you have the choice of matching the plaid either above the bust, or below, but not both. I chose to match below the bust, as I will usually wear this with the lapels open and that will mostly obscure the princess seams above the bust.

Bias Fringe

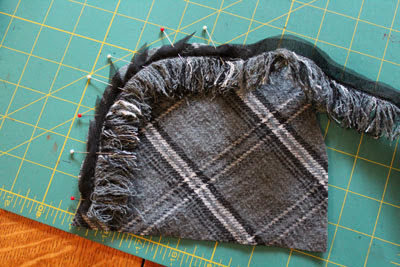
Three years ago I made a jacket using a Sandra Betzina pattern, Vogue 1036. As part of this project I made some bias fringe to insert into the seams. Bias fringe is different than regular fringe, as you start with bias strips of fabric and separate the threads to make the fringe. It is very time intensive.

Gwen, of the blog All My Seams (and who passed very recently) asked that I write a tutorial on how to create the fringe. You can see my page on Bias Fringe Technique. You can refer to the tutorial for the specifics, but here are some photos of this project.

For this vest, I made three strips of bias fringe. Two were about 24" long and the third was 36" long. The 24" strips took me about 2 hours each to fringe. The 36" strip took me about 3 hours. It was challenging to fringe the plaid flannel, especially once it had been washed. Flannel tends to "grab" itself and doesn't easily separate. This technique is easier with a boucle or a handwoven fabric.

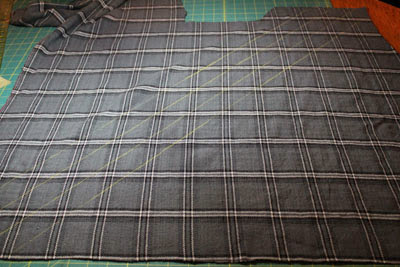
Cutting the 1.5" bias strips.

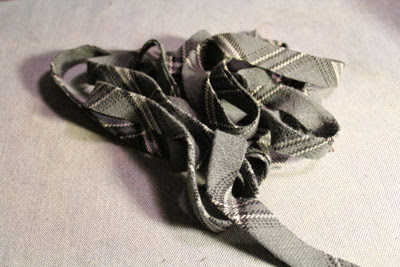
The bias strips cut and pressed.

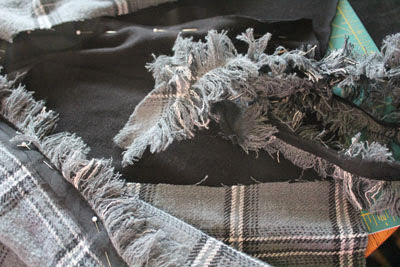
The fringe on the right is in process. It is wild and unkempt. The fringe on the left has been "groomed" and pinned to the front of the jacket.

I didn't want the fringe to be overly heavy, so I only lightly trimmed any errant threads, leaving the rest to look a bit uneven and more organic.

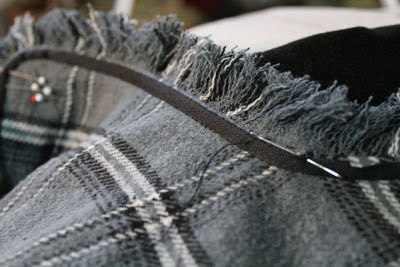
After the fringe was inserted into the outer seam of the vest and the pocket, I wanted to add a bit of definition, so I hand sewed charcoal grey cotton twill tape to the outer edge of the jacket and to the pocket. I hand sewed each edge of the narrow twill tape. This step was also quite time intensive, but I enjoy hand sewing.

Bias Pocket

I have showcased zippers quite a bit recently, so I wanted to avoid zippers on this moto vest. I mulled over my pocket choices and decided to add a bias patch pocket with rounded edges. I also featured the bias fringe and the cotton twill tape around the pocket.

Keyring Closures

Look Ma, It's Keyrings!!

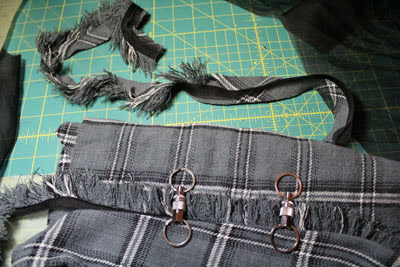
Auditioning the key rings, along with the bias fringe. The fringe on top is in process.

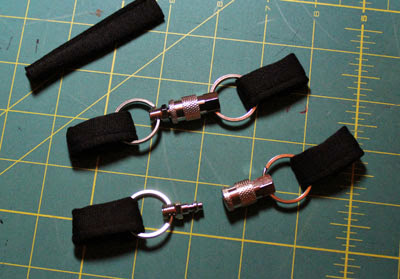
A few weeks ago I was in the local hardware store buying electrical wire. At the cash register, they have a display of keyrings, including caribiners. In the display was a silver-colored keyring that intrigued me. On each end of the keyring there is a round metal circle that can hold keys. If you trigger a little mechanism, which you push like a plunger, the larger keyring separates into two smaller keyrings, each with one ring. I was very excited by this keyring, though the guy at the cash register clearly thought I was odd, as his response to my exclamations over the cool mechanism was a dry, "We do what we can." I thought this keyring would make an interesting closure, so I bought one. I went back this week and bought a second one, as I wanted two for the vest.

To attach the keyring to the vest, I made 4 loops out of the black ponte and put one loop through each ring. I top-stitched the loops to the vest.

This may be my favorite part of the entire project.

Garment #2: Dress

For the dress worn under the vest, I used another TnT pattern. I first made the Marcy Tilton Shingle Dress last May. This time I omitted the shingles and made the under layer. I used 3/4 sleeves, the same as before. I made a few changes:

  • Cut the neckline 2.5" lower in front.
  • Used a regular necking binding, a la Sarah Veblen.
  • I shortened the dress by 4".
  • Hemmed the sleeves and the bottom. (The original dress had raw edges.) For this I used my coverstitch machine.
  • Took in 8" (2" from each side seam) at the hips.
  • Took in 2" (1" from the underarm sea) at the bottom of the sleeve.
  • Omitted the shingles (as mentioned).

This dress sews up so quickly, especially if you leave off the shingles. It makes a great LBD!

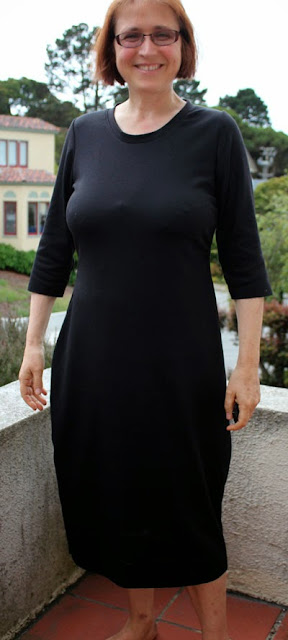
I thought it might be interesting to show you the fitting I do which is typical for me. I first sewed up the dress as it came out of the envelope (after I'd done my vertical-only FBA, which I did the last time I made the dress. Here is how the dress looked after I'd sewn it up, but before I'd hemmed it or take it in:

Before hemming or taking in the dress. You can see that it is designed for a Pear Shape, which I am not.

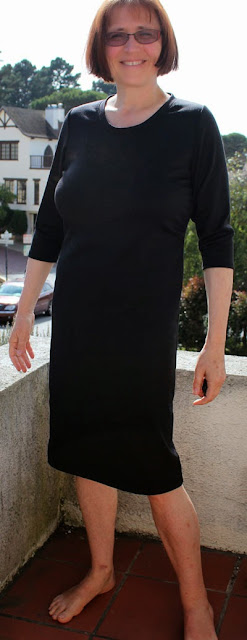
After taking in the sleeve (2"), and the hips (8"), and taking up the hem (4").

Conclusion

I'm very pleased with this outfit! I am disappointed by how much the plaid fabric pilled with one trip through the washer/dryer, but I like the overall effect of the plaid moto vest. The dress will be a great basic and I might even cut off the neckline to make it a bit deeper and then replace with a new ribbing. The ponte washed and dried beautifully with no signs of pilling. But my favorite aspect is definitely the keyring closures!

More Pictures

Worn open

Fully closed

One lapel open

Both lapels open

I like how the fringe stands up at the back neck!

Flashing the lining

Patterns