Pages

Monday, May 30, 2016

Sewing for Hot Weather


Well, it's time. If you have been reading my blog for awhile, you may remember back when DD1 went off to college in Oregon. In fact, it was four years ago. She graduates in the next couple of weeks. I'll be heading to Oregon for the occasion and it appears that the weather may be in the 90s.

The 90s.

ICK.

My least favorite weather to dress for is hot weather. And my least favorite sewing is clothing for hot weather. That, and home dec. ;)

I think I've figured out what I'll be wearing for the occasion, though my first try wasn't completely successful.

TOC:


Tank Dresses

When I visited Hawaii in 2014, I made a tank maxi dress. I used Style Arc Annie's Cami pattern and lengthened it to full length, flaring it to 60" at the hem. I was surprised at how much I enjoyed wearing that tank dress with my black voile tie top.

For that dress, I used a fabric that I received in a free FabricMart bundle. There was a problem, however. Every time I wore that dress, it sagged out around my bottom. My rear isn't that big—but the fabric was poor quality. After wearing the dress a few times and being annoyed by the bubble butt effect, I got rid of it.

I thought maybe the outfit I made for Hawaii would be a suitable outfit to wear to DD1's graduation if the weather is hot. I ordered 2 yards of a colorful viscose/lycra jersey from Marcy Tilton. (I can just barely squeeze a tank dress out of 2 yards if it's 60" wide. I can get away with a bit less if the pieces can be cut without regard to direction.) I also dug a black & cream, rayon/lycra, ikat print, jersey from my stash.

I made the pattern exactly the same as before, except I cut the dress 1" longer, based on the notes in my blog post. I made the black and white dress in a few hours on Friday evening, and the colorful one in a few hours on Saturday morning.

At least summer clothes can be a fast sew. ;)

I like these dresses, and they will be great to wear in hot weather, but once I saw the photos, I realized that these outfits are wrong for the graduation. They are too casual and the black tie top is too... heavy looking. It's very lightweight, but it doesn't look lightweight.

Back to the drawing board. I'm working on another ensemble.

Meanwhile, these dresses will come in handy. I am spending a week in NYC this summer. The fact that I'm going in the summertime shows you how determined I am to visit NYC, given my dislike of hot weather.

I like how nothing shows at the armhole - no bra peeking through.

I finished the neckline and armholes with self made binding: I cut 1-3/4" strips from selvedge to selvedge (the stretchiest direction). I pressed them in half and then "walked" them along the pattern, stretching more where I want a closer fit (at the bottom curve of the front and back armhole, or at the bottom curve of the neckline, for example) and stretching less where I want less of a body hugging effect. I cut them to that length, and sewed them into "rings" with a 1/4" seam, pressed open. I divided the openings, and the binding rings, into quarters, and pinned them at the one-quarter markings, placing the seam at CB. I sewed the bindings to the dress with a 1/4" seam allowance, stretching more in some areas, and less in others. The finished bindings show from the right side.

Necklaced purchased maybe 5 years ago, by Teresa Goodall


Floaty Top

On Sunday afternoon I was inspired to whip up a hot weather top. Not to wear to the graduation, but maybe when traveling to Oregon. In any case, it will be useful for one of the rare hot days we have in San Francisco or Mountain View.

Last summer (maybe when Patti F was visiting?) I purchased a wiggly, tie-dyed, striped, 100% rayon challis from Satin Moon. I finally had a flash of inspiration on how I wanted to use it: McCalls 7194, an asymmetric top. I made this top before using a very different fabric - a knit with holes. This fabric has zero stretch but beautiful drape.

I liked that this pattern would put the stripe on the bias, at least the way that I use it. I left a slit in the side with the long seam. I omitted the sleeves and finished the neckline and arm holes with self made bias binding. (Cut the stripes 1-1/2" wide, on a 45° bias, folded in half and pressed, and sewn to the openings with 1/4" seams. Then turned to the wrong side and topstitched in place.) I finished the hem and side slit with micro seams. I also matched the stripes at the side seams.

This top is floaty and easy to wear. The high quality rayon challis does wrinkle but, in my experience, the wrinkles tend to fall out quickly, especially when the garment is cut on the bias. (I love wearing the bias cut top I made from a rayon challis border print. And the wrinkles really do fall out.)

I'm wearing it here with bare arms, but I also ordered a 3/4-length sleeved, ivory mesh, Sleevey Wonder, so that's also an option.

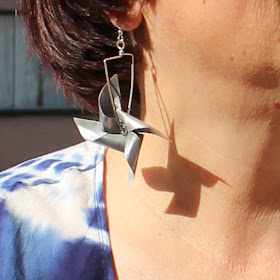
Pinwheel earrings by Eccentric Designs


Frocktails

I was recently invited out after work for Frocktails.

Have you heard of Frocktails?

Well, let me enlighten you. The term originated in Australia in late 2015. Sewers were invited to wear a self made frock to a cocktail event. Voila, frock + cocktails = frocktails.

I became aware of the event, and a subsequent Frocktails event, on Instagram.

Savage Coco, pattern designer, invited me for drinks at a club in the Financial District. At first I thought she was using the word "Frocktails" loosely—she's wicked witty—but when she mentioned that she would be wearing this dress, I abandoned my idea of wearing my favorite Presto top (her pattern) and jeans. I had to try harder.

I don't own many frocks, but I dug into my closet and found McCalls 6028, made from Scuba knit and wool doubleknit. Luckily it was a chilly day in San Francisco, as I don't have any warm weather frocks. I topped it with my purple donuts coat and my metal thingie cowl.

Meeting SC was perfectly delightful! She sews beautifully, is wonderfully witty, and very glamorous. I look forward to many more Frocktails get togethers! You can follow Savage Coco Patterns (or me) on Instagram.


Pressing Tools

I've blogged before about my collection of much loved pressing tools, particularly those from Stitch Nerd.

I still wanted a contour custom ham. And when I saw this wonderful quilting cotton at Britex, I bought one yard and sent it off to Stitch Nerd to sew into a contour ham and a pressing mitt.


I seem to be alternating sewing for my Paris wardrobe and for hot weather. I expect that to continue, though I have many items in the queue for Paris, so I can't take my eye off that deadline. In fact, I am working on another layer for Paris right now. It's requiring a lot of hand sewing, and I'm not yet sure how much I like it, but I feel it's worth taking a creative risk. The worst thing that can happen is that it doesn't make the cut for Paris. Or maybe I lose a little fabric. ;)

Join me on Patti's Visible Monday and have a great week!

Sunday, May 22, 2016

Teal Minoru for Paris


TOC:


Teal Minoru

I've finished a cornerstone piece of my Paris wardrobe!

As you can see, I've selected a teal, cobalt, and black color palette. I bought this gorgeous brocade from Marcy Tilton over the Christmas break. When I first saw it, I sent Marcy's team an email asking for more information—I had a question about the color—but I didn't actually order it. Then my friend, Patti F from Chicago, emailed me that she had just ordered a gorgeous fabric from Marcy and she sent me a pic.

It was the same fabric!

Marcy often doesn't carry large amounts of a fabric, so I quickly put in an order. Once her team returned from the holidays, they informed me that they only had 1.5 yards of the brocade left and did I want it. I said yes and figured I'd find a way to use it.

When Patti received the five yards that she had ordered, she decided that she didn't want to use it for the project that she originally had in mind. She offered to sell me 1.5 yards.

Thanks to her kindness, I was able to make the Minoru that I originally envisioned.

THANKS SO MUCH, PATTI!

I made my first Minoru over the holidays. That coat quickly became a wardrobe staple. I LOVE it! I knew I wanted to make it again for my Paris wardrobe, when Margy pointed out that gorgeous brocade.

I actually started this project at a sewing retreat last March, but I couldn't finish it. I ordered a custom zipper that didn't arrive in time, I needed decent shoulder pads (the shoulder pads available at Hart's were nasty foam pads by Dritz), and I didn't have the right lining fabric. I finished the shell of the coat and moved on to other things.

The project languished for awhile until I returned to it a couple weeks ago. The zipper arrived (though I didn't notice at first that it wasn't the double-ended zipper that I thought I had ordered), I bought some nice shoulder pads from Britex, and a gorgeous silk charmeuse lining from Emma One Sock.

Sewing in the sleeve lining

In addition to the changes I made for the first coat, I made a few additional changes for this version:

  • The brocade wrinkles badly, so I underlined the entire jacket with Pam Erny's ProSHEER Elegance LIGHT Fusible Interfacing. Her interfacings are fabulous, but this fabric was a bit resistant and wanted to peel away, so I also sewed around the raw edges of each pattern piece.
  • Shortened the sleeves by 1" and drafted a sleeve hem facing.
  • Omitted the hood.
  • Stiffened the collar stand with rows of machine quilting.
  • The jacket, as designed, gathers into the collar. I took a note from Margy and replaced the gathers with darts.
  • In addition to the welt pockets on the coat, I made two internal patch pockets on the lining—it's perfect for stashing travel documents, cash, or credit cards!
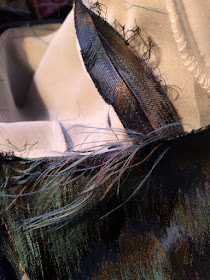
  • This fabric also ravels like crazy. I could have serged around the raw edges, but I didn't. I just dealt with it.

I'm mostly happy with this coat. I wish I had done a bit more shaping at the side seams but I'm not sure I feel strongly enough that I want to open up the lining to address that. I love the color. Look for more teal, blue, and black coming from my sewing room!


Accessories

Since I know someone will ask, so...

I bought this "button" necklace at Style 16 from Judith Content. Judith is a textile artist and she also sells these wonderful button necklaces and earrings. She starts with white plastic buttons and she stencils and paints them. She mixes them with fibers and creates delightful jewelry. In fact, I found a Pinterest board that someone created of her work. You can also follow her on Instagram.

I love Fly London footwear and these are the Fly London Simi boots in Petrol. A cool feature of these boots is that they have four functioning zippers - one on the inside and outside of each boot.


Google I/O

Last week was Google I/O, the conference for developers who use Google services and APIs. For the first time it was held at the Shoreline Amphitheater in Mountain View. I had a deliverable for this event. As part of that effort, I also worked two shifts during the show.

This meant I was compelled to wear a tee shirt.

This is sartorial hell for me. I love wearing tee shirts, for sleeping in.

I feel frumpy in a boxy tee shirt. In order to get a tee that fits my uber bust, I take an XL... in MEN'S. (The women's sizes are so small...) The sleeves end at my bust line, emphasizing my uber-ness. The crew neck doesn't flatter me. It's super long, which is great in a sleep shirt, but adds to the "tent-like" effect.

Yes, I could do some tailoring, but I don't see the point for a shirt I will wear in public exactly once. I mitigated the frumptastic effect with some fun earrings and shoes, purchased from Simply Bella. (You have to call as these aren't listed on her site, but they come in at least five colors.)

One of my favorite displays at the show is the new self driving car.

It's so CUTE! I want one.

I wonder what the pedals are for...

They invited graffiti on this giant Android

We've had a rainy spring, at least for us. I have never seen a mushroom like this before—I took this pic near my office in Mountain View.

Do you know what kind of mushroom this is?


CBS Sunday Morning

I know I've mentioned before that one of my favorite TV programs is CBS Sunday Morning. Once a year they have an episode dedicated to design-—this is my favorite. Today's design episode had a piece on Dressing Down: the Rise of Athleisure, which you can watch at that link.

They also had a wonderful piece on the home of Christian Dior in the south of France, which has recently been re-opened: The House of Dior.

But I think my favorite story was about British architect, Thomas Heatherwick. Wow his work is STUNNING. I particularly love the "garden bridge" he has planned for over the Thames, which reminds me of the High Line in NYC. (I've never seen the High Line in person, but I hope to remedy that this summer.)

When I was reading up about his amazing work, I saw that he has designed a new campus in Mountain View for Google. Somehow I missed that announcement last year. Sheesh, it looks unreal. I wonder if this will happen in my lifetime...


I have more projects in various stages of completion. My daughter's graduation is in a couple of weeks and it may be hot, so I need to address that wardrobe need.

Have a great week!

Monday, May 9, 2016

Tutorial: Tiny Machine Hem for Sheer Fabrics


Some of you asked me to show how I achieve a narrow machine hem on a sheer fabric. I learned this technique back in the early 80s and I'm not even sure from where, but I did not originate it. The finished hem, as tiny as it is, contains three rows of stitching. This adds the tiniest bit of weight to the hem, to a very nice effect.

It has been suggested (in the comments) that this technique originally appeared in a Threads article many years ago. That may be where I learned it as I was a voracious Threads reader back in the 80s. One reader remembers that it was attributed to Calvin Klein. Maybe someone can look it up in their Threads Archive and let me know!

I rushed to get these pics after work and before I lost the daylight.


Step 0: Prepare and press fabric. I rough cut this strip very quickly which is why it's a bit ragged.

Step 1: Run a line of machine stitching. Press. (Press at every step!)

Step 2: Fold the raw edge under, with the row of stitches just slightly towards the back side. This is called favoring the seam or, in this case, favoring the right side of the garment. Run another row of machine stitching just along the edge—as close to the edge as you can while keeping it at a consistent distance from the edge. In order to make this process easier, I move the needle position closer to the edge of the fabric. Press.

Step 3: Trim the raw edge, as close as you can to the stitching. Go slowly. This is a good time to use your duckbilled scissors, if you have them. I don't know where mine are, so I used my Kai scissors. Press.

Gingher Duckbilled Scissors

Trimming complete. Again, I was in a rush.

Step 4: Turn the hem under again, as close as you can. I don't use pins. With practice, you can get the finished hem to be 1/16th to 1/8th of an inch. Run a final line of stitching to secure the hem. Press.

Completed hem. I did this in a rush, so it's not my narrowest hem.

I also used this technique here.

If you want to use this technique on chiffon, first stiffen it with Perfect Sew or liquid starch. I am a fan of Perfect Sew and have blogged about it.


Also, I did not serge the seams on my duster. Serging adds a lot of thread and makes a seam more obvious in a sheer fabric. I used a traditional seam for sheer fabrics: I stitched a normal seam, then I stitched a second row of stitches 1/8th of an inch from the first seam. I then trimmed very close to the second row of stitching. This results in a more subtle seam.

Thanks for all of your kind feedback on my duster!

Sunday, May 8, 2016

Sheer Duster, Snap Press, and More


TOC:

Sheer Evening Duster

Last month I visited Hart's Fabric in Santa Cruz and found this novelty organza in the home dec department.

What did it want to be?

It wanted to be an evening duster! I think this fabric was intended for curtains, but I clearly heard "evening duster."

The Met Gala ball was last week! Maybe I was inspired?

The novelty organza with silver organza I used as the interfacing.

I decided to start with the Sandra Betzina vest I recently made, with a few additional changes:

  • Lengthened the vest by 15".
  • Omitted the pockets.
  • Added side slits up to my waist. That way it's easier to stick my hands into pockets in the underlayer.
  • Added sleeves. (From Butterick 6238.)
  • Rather than standard interfacing, I used grey poly organza in the front bands and the collar. (The collar isn't supposed to be interfaced, but I wanted a bit more body.)
    Front bands. The one on the right is overlaid with the solid organza.

  • Used clear elastic in the collar.
  • All of the hems use tiny 1/16th-inch machine hems.
  • Antique silver snaps instead of buttons.

I like how floaty the duster is!


Snap Press

Perhaps you remember that I bought a snap press a few months back. Once it arrived, I liberated it from a nest of firmly wrapped and thoroughly taped bubble wrap, and stuck it on a shelf.

This project was the perfect time to get it out and put it together. The assembly is minimal—you install the handle with one screw. I mostly use size 24 snaps, so when I purchased the press, I selected the "11mm Die for Prong Snaps with Button" die set.

I buy size 24 snaps from Snap Source. A snap has four pieces: the cap is the decorative part on the outside of the garment. The only difference between a size 16 Snap Source snap and a size 24 Snap Source snap is the front cap. The other 3 pieces of the snap are the same as the size 16.

The snap press with the 11mm die set works great for the front of the snap! But the 11mm die is too big for the back of the snap - it doesn't securely hold the back part of the snap. Since I didn't have the right die set for the back of the snap, I installed the back part of the snaps using the plastic setter from Snap Source, and a hammer.

Aside from the size issue of the back of the snap, I really like the snap press!


Talk at Cañada College

With Ronda Chaney, head of the Fashion Department

I mentioned a few months ago that I was going to be the guest speaker at an event for the Cañada College Fashion Department.

The talk happened last month and seemed to be well received. Cañada College posted a recap (with lots of photos) of the event on their blog.

Ronda provided 10 models—students from the fashion department—to better show the close-to-50 garments that I brought. (The recap lists 44 garments, but I threw in a few more at the last minute.)

I was blown away by Judy, who came all the way from San Diego to hear my talk!

Thanks to Ronda and all of the models!

And special thanks to Sarah, who modeled and took photos!

First Monday in May

You have probably heard of the annual Met Gala, a star-studded event that benefits the Costume Institute at the Metropolitan Museum in New York City. The Gala kicks off a special costume exhibit at the museum. As Andre Leon Talley puts it, "the Met Gala is the Super Bowl of Fashion" and I enjoy seeing how the celebrities embody the theme each year.

This year the theme is Manus X Machina and examines how hand sewing and machine sewing are used in haute couture. Last year's theme examined the Chinese fashion and it's influence on western fashion. If, like me, you missed last year's exhibit, you can watch a documentary about the exhibit and the gala.

The First Monday in May (so called because the gala is held on the first Monday in May), is a fascinating glimpse into what's involved. I saw it today (Mother's Day) at the Landmark Theatre in San Francisco's Embarcadero. I'd never been to this theater before, but I enjoyed the small theater and the fact that each seat was a comfy recliner. I don't know how long the movie is playing there, but it's a great way to experience it!

And I think that, this year, I will try to get myself to New York to see this exhibit in person. It ends on August 14th, so I hope to make it work.


Fabric Depot in Portland

Almost exactly one year ago I visited Portland with some sewing friends. On that trip I managed to visit most every fabric store in Portland, except for one. Fabric Depot is one of the largest brick-and-mortar fabric stores in the U.S.

I just returned from another quick trip to Portland. This time I had a rental car and was able to stop by on my way back to the airport.

It's rather unusual to see such a large contingent of carts in a fabric store

I couldn't get the entire store in one picture

It is a very large fabric store, though the fashion fabric section is eclipsed by the quilting and special occasion fabrics.

I managed to find a piece of novelty pleather!

I'm glad that I squeezed in a visit! I can now tick that store off my list. ;)


Photo Roundup

I have been pretty busy lately, which is why I'm sewing less. I also took a couple short trips since my last post. Here are some photos from my various travels. Enjoy!

Five giant (up to 23 feet tall), inflatable, glow-in-the-dark bunnies came visiting from Australia, which you can read about here, here, and here.

It's such an interesting way to bring attention to the eco damage caused by rabbits (a non-native species) to Australia.

I mean, if the point of the exhibit is to raise attention to the danger of the rabbits, why make them so cute? :)

Last month I took a quick trip to Seattle for work. While there, I checked out Archie McPhee, a novelty store.

They do carry some fabric, by the way. Not a lot, but I was more entertained by the finger tentacles...

... and the Handerpants. My friend Christine quipped that these would be great to wear while fly fishing. LOL

I also checked out Seattle's Cat Cafe, the Meowtropolitan

This is a place where you pay $10 for a coffee drink and the ability to spend an hour with a clowder of cute-but-largely-indifferent cats.

I'd definitely visit again! In fact, it would be a great place to hang out with some knitting. :)

The purpose of my trip to Portland was to visit my eldest daughter at university. Her senior project, a dance that she choreographed on nine dancers, was part of the Spring concert.

Youngest daughter also came with me. As we waited for the show, she entertained me with Snapchat filters.

It was great to see Eldest Daughter's piece and also to see her perform (in another piece)

The next day they surprised me with an early Mother's Day picnic

And some camera play


A quick walk through Portland's Washington Park

It's good to be back home!

(A flower in Salem, near the Airbnb where I spent 2 nights.)
Have a great week!