Thursday, July 29, 2010

Fun with Eye Color

The same photo, with different cropping. I see DD2!

This is a fun exercise! I got the idea from Janis, who uploaded a close-up of her eye to colorhunter.com, in order to break down the dominant colors in her eye. The theory being, of course, that our eye color is a flattering color for us to wear.

I asked DD2 to take an up-close photo of my eye. I cropped the same photo twice, one with more skin showing than the other. I ran both versions through colorhunter.com and also through DeGrave.com.

I think I need to buy more green fabric! ;)

colorhunter.com, maximum crop

degraeve.com, maximum crop

colorhunter.com, less cropped

degraeve.com, less cropped

Wanna know something weird? I am the only green-eyed person in my family, including all extended family members living when I was a child. Everyone has blue eyes, except me. My sister used to tell me it was proof that I wasn't a legitimate member of the family. ;) Even both of my kids have blue eyes!

I haven't done any sewing since returning from San Diego. It's been all work during the day, and vegging out at night with the Kindle that DD1 gave me for a belated birthday gift.

Shams needs to get back to sewing. ;)

Saturday, July 24, 2010

San Diego - Day 2 - More Reviews!

Today is our second, and final, full day in San Diego. Comic Con 2010 ends tomorrow afternoon, but we leave in the morning. I am eager to get the 8 hour drive behind me and to return to my sewing machine.

After depositing the Teen Units at the San Diego Convention Center this morning at 7am (the Male Teen Unit insists on an early start and the convention center is 30 minutes from our hotel, so we leave at 6:30am), I headed for La Jolla. I was trying to remember the last time I have been to La Jolla. I am pretty sure, upon reflection, that it's been...well, never. I thought I had been there, but really, I can't remember ever visiting and none of it felt familiar. I've certainly been aware of it, so does that count? :)

Now that I have been there, La Jolla reminds me of a smaller version of Carmel by the Sea. I have been there, several times, most recently maybe 18 or 19 years ago. (If you get the impression that I stopped going out after having kids, you'd be right.)

The town of La Jolla is perched dramatically above the coast, with beautiful ocean views, and is a fairly well heeled community, with loads of tourists descending in the summer. Like most Pacific coastal cities, such as San Francisco, Carmel, and Santa Cruz, the weather is often gray and overcast, especially in the summer. It was like that today, though the temperature was a pleasant 70 degrees. But I wasn't particularly inspired to take gray "scenic" photos.

Because I arrived before most of the shops were open, I walked around the town, looking in the windows, and capturing a few photos of garments that appealed to me. For example, look at the draping on this golden goddess-dress. How amazing would that be as a wedding dress? (Sorry for the quality of the photos, but the lighting, reflections, and the windows made it a bit of a challenge.)

I love how the fabric is used in this polka dot dress. I have fabric just like this from FabricMart. Of course, I can't wear this particular style – I have been ruminating on just how to use such an interesting piece.

The same store (I think it was called Georgio's) also had this polka dot dress in the window. No, it wouldn't work for me, but if I were younger, thinner, with small perky breasts, I would don this (and the previous two dresses) in a heartbeat!

Finally, the shops started opening up and I headed straight for Pomegranate. I discovered this shop by googling "La Jolla babette blanque", which are two brands I like and, voila, out it popped.

I must have been the first person to walk in today and I was greeted warmly by the sales clerk, Irene. I had read that the employees at this store were not friendly, but that was not my experience. They were having a sale on their summer clothing, but had already started receiving fall items. For an hour or so, Irene and I admired the unusual fabrics and interesting details in some of these garments.

See the white top in the window (on the far left) – it's difficult to make it out, but I was curious about the print, which had lots of black lines and large-print labels with numbers like 46, 48, etc. Irene said they couldn't figure out what the print was supposed to represent, but they had noticed that the numbers were all even. On closer examination, I realized that the print shows the line drawings of pattern layouts, for different European sizes (46, 48, etc). I loved that fabric!

I tried on several garments and found two that I really liked, but not well enough to break my budget. I definitely recommend visiting this boutique, but if a trip to La Jolla is not in your future, you can see a sample of the garments they carry on their website.

About then, I was starting to worry about my parking situation. In La Jolla, as in San Diego, vigilant meter maids are always ready to enforce the 2-hour parking that you find throughout the town, and I had parked quite far away from the shop. I heard that parking tickets are very expensive in this area, and I wasn't interested in finding out how expensive.

However, there was one other La Jolla shop I wanted to check out, Jane's Fabriques, on Girard Street. It was on the way to my car, and I figured I probably had a ticket already, so I popped in for a quick peek. I had read that this store had fabrics that would appeal to the St John's crowd, so I was interested to see their offerings.


Immediately upon entering my eyes fell on a polka dot fabric that I had to have. It's a cotton silk blend, rather sheer, and I'm not sure if it's a chiffon or a voile. It feels a bit like both. It's a border print, but on both selvedges, which makes it a bit trickier to visualize, at least for me. I have no idea how to use it, but I secured three yards. I also loved a silk chiffon "travel" print, but it did not come home with me. The fabric budget must be respected.

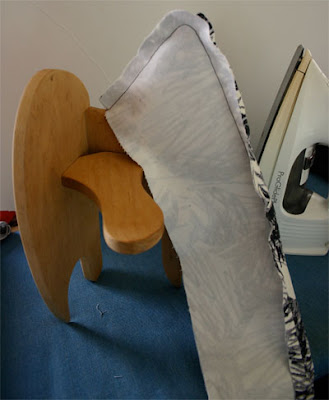
The silk/cotton double-border-printed voile/chiffon.

They had an entire wall of cotton batiks, and a few rayon batiks on a rounder. They had quality wools, boucles, and silks, which I did not examine closely. The shop is definitely worth checking out.

By this time, I really needed to get back to my car, but my keys were nowhere to be found. The sales clerk helped me look and they were finally found on the bathroom floor – the non-public, employee bathroom that they kindly let me use. Thanks to the helpful clerk who helped me look for my keys! (I'm sorry I forgot to ask your name.)

I was starting to droop (the last few days were catching up with me), so I decided it was time to leave La Jolla behind, grateful that I did not get one of the legendary parking tickets.

A friend in the Bay Area had asked me to pick up a few Kwik Sew patterns at 40% off, so I headed for the Yardage Town closest to La Jolla. It turns out that the Madison Square Yardage Town, on Clairemont Mesa Blvd, is the 2nd biggest YT after the warehouse store in National City, and it's only 7.5 miles from the fabric store in La Jolla. I was impressed by how clean it was, how well stocked, and well organized. (I was a bit less impressed by the customer service.) Such a huge improvement over your average Joann's. After talking to the clerk there, I realized that I had really missed out at the National City Yardage Town yesterday. They have a basement, a huge basement, with rooms dedicated to various trims, and much more fabric, and I had missed it completely. Oops.

Yelp had mentioned that there was a great vegetarian restaurant in the same shopping strip as Yardage Town, so I had a late, and very yummy, lunch at Sipz. My Spicy Basil "chicken" with vegetables and brown rice did not disappoint.

It was only early afternoon, but I was done. As in, no more energy left, and I returned to the hotel for a long nap. Therefore, a shorter report today...

You're welcome. :)

The hotel gardens.

San Diego - "The Spirit of Cloth" review and more!

I'm in San Diego for a few days while DD2 and her friend (hereafter known as the Teen Units) enjoy Comic Con 2010. I've been seeking out textile shops and worthwhile clothing boutiques to pass the time. San Diego doesn't seem to have as many "must see" textile-related destinations as one might hope for in a large metropolitan area, but I have managed to find some worthwhile spots to visit.

I dropped the Teen Units at the San Diego Convention Center at 7am today, so I had some time to kill before most businesses opened up. After breakfast at iHop (where I ate, just to say I did), a little trip to Walmart, and an aborted trip to Joanns, where the two employees left the store three minutes before it was to open and hadn't returned several minutes after it was supposed to open (so I left), I started by visiting the Yardage Town Warehouse in National City, which, conveniently, opens at 9am on weekdays.

The outside of Yardage Town, located in an older strip mall, is not impressive. But when I walked inside, it was as if I had been transported 30 or 40 years back to the old New York Fabrics chain of my youth. Inside is a large room, a really large room, filled with... wait for it... FABRIC. Fabric on the walls, fabric on round islands, fabric on flat fold tables, home dec fabrics on giant rollers. I hadn't realized how much I missed a giant room full of fabric to explore. They also carry the big 4 patterns, as well as Kwik Sew, all at 40% off. I picked up several KS patterns I've been eyeing. While I'm not saying that you will find cutting edge fabrics at YT, or luxurious, decadent fabrics, they have some nice selections and I picked up a few pieces, on sale. I found the sales staff to be very nice and helpful, and those I dealt with, know how to sew and are interested in sewing, which is always refreshing.

After a lengthy visit to Yardage Town, I set the GPS in my car to the Old Town of San Diego. Old Town is the historic part of San Diego, a tourist destination full of shops, restaurants, and the odd mariachi band. A friend had told me about the fabric store, The Spirit of Cloth and I wanted to check it out.

Sally Hickerson, in front of her fabric store in Old Town, The Spirit of Cloth

Ensconced between two really nice bead stores on Juan St, The Spirit of Cloth is a small, but well appointed fabric store owned and run by Sally Hickerson. Many sewists know Sally as the former owner (for 25 years) of the well loved independent fabric store, Waechter's Silk Shop in Asheville, North Carolina. I've never had the pleasure of visiting Waechter's, but I know several sewists through Stitcher's Guild who have frequented that shop for years. Sally opened The Spirit of Cloth about a year ago, and it's a jewel.

It's not a large store, but you see beautiful fabrics, carefully selected, everywhere you turn. Inspiring sample garments of Diane Ericson patterns, Sewing Workshop patterns, and other independent patterns decorate the room. A wall of great independent patterns, such as La Fred, Kayla Kennington, Loes Hinse, Sewing Workshop, is near the register. She offers classes from time to time on the second floor (over one of the bead stores). I recognized several of her fabrics as those carried by Marcy Tilton, Britex, and some of the nicer offerings from Fabric Mart, and her prices were reasonable. A rack of antique kimonos, and pieces of kimono fabrics are for sale.

I had never met Sally before, but we had great fun chatting and I bought one piece of beautiful striped cotton (destined to become a SW Hibiscus top) and a single gorgeous button. I could have easily picked up some of her Tencel denim, or her Ikat denim, or her beautiful striped rayon, but I was feeling the need to watch the fabric budget... for now. I may be phoning her later to pick up a piece or two. Heck, if I lived closer, I'd be there all the time. I might even work there occasionally. :)

Me in Fabric Heaven! Don't I look at home amongst the silks from Vietnam? I'm wearing my test Plaza jacket, over a Mimosa top. Not shown are my cream linen/silk/rayon Trio pants. Hanging from the ceiling is a sample Plaza jacket made from a sheer fabric.

After visiting Sally, and getting many recommendations for places to see in Old Town, places to eat, and other places to visit in the San Diego area, I left to pursue her suggestions. Old Town is a nice place to explore, so I wandered around for awhile, enjoying the beautiful day. (Did I mention at home it's been in the 50s, chilly and cold? San Diego has been in the 70s - very nice!)

Scenes from Old Town

Next, I set my GPS to Little Italy, near the Convention Center.

Sally had told me about Carol Gardyne's Boutique. Carol does gorgeous fabric painting, and she also sells beautiful, Paris-inspired clothing with interesting silhouettes and made from beautiful fabrics. Given that the best I could find was a 15-minute meter for my van, I didn't have long to check out her boutique, but she did have some beautiful pieces, including some attractive, reasonably priced jewelry, and her silk painting is gorgeous.

After a quick dinner at Landini's Pizzeria, and buying some Canoli and Chocolate Dipped Strawberries from the bakery deli at Trattoria Fantastica for the Teen Units (another recommendation of Sally's), it was time to pick up the two exhausted Comic Con-ners and head back to the hotel.

All in all, a great day. :)

Sunday, July 18, 2010

McCalls 6165 - Layered Tunics

I am a fan of the funky swing tunic with non-linear hem that has been available in upscale boutiques for some time now, but the style is now appearing on teens. For example, my daughter recently brought one of these home and she would not have worn this style even a few months ago. Of course, hers is more youthful with its cropped hemline and giant trompe de l'oeil bow, but don't fashion trends typically migrate in the other direction?

Twice I have made Very Easy Vogue 8542. Though I made the grey top only last August, it has seen serious duty and has become quite pilled and worn – I find myself thinking I should toss it, but then I wash it and put it right back into rotation. I haven't worn the red rayon version as much – it's a bit more formal.

I made another, somewhat similar, tunic by Marcy Tilton – Vogue 8582. I have worn it more than the red top, but less than the gray top. This one was made from a slinky fabric and I find I don't wear slinky fabrics as much.

McCalls recently threw their hat into the ring and offered their version of this style – McCalls 6165. This pattern has some interesting features.

  • It is designed to be layered.
  • There are three under tunics (views A, B, and C) with different necklines and sleeve lengths.
  • The over tunic (view D) is a tank style with an open neckline and a wider armscye to accommodate the sleeve on the under tunic.
  • The under tunics are similar in design to Vogue 8542, except they have no side seam – there is a side panel instead, but the overall silhouette is similar.
  • The Very Easy Vogue tunic has dropped sleeves and the McCalls pattern has set in sleeves - a design line I find to be far more flattering.
  • The over tunic is similar to Vogue 8582, except the side drape is on both sides and the drape is shorter and wider than the drape in 8582.

I decided I wanted to use this pattern for an expensive, sheer, cotton, single knit jersey I bought at Britex. However, I wanted to make a few changes:

  • I wanted to make the under layer using a black mesh knit I purchased as Fabrix and I wanted it to be sleeveless.
  • I wanted the over tunic to have the sleeves. This way I could showcase the pretty Britex fabric and use the mesh tunic strictly for modesty in the main body of the garment.

The sizing of the pattern seems to be off. It is labeled as a "close-fitting" design. The bust for a large is 38-40" and an XL is 42-44". My bust is 43" (high bust) and 48" (full bust). The finished bust measurement printed on the pattern for the over tunic was 41" (L) and 45" (XL). The bust measurement for the under tunic was 37-1/2 (16), 39-1/2 (18), 41-1/2" (20) and 43-1/2" (22). (Yes, the over tunic is sized XS-XL and the under tunics are sized 4-22.) However, when I pin fit the pattern tissue for the under tunic, it was clear that the size XL would fit me without adding an FBA, and my full bust measurement is 48". The over tunic is much larger than the number on the pattern tissue as well. At the bottom of the armscye, the pattern piece immediately veers away from the bust line, so it is very loose fitting, not close fitting at all.

To summarize, check the measurements before cutting! You may want to go down a size, especially for the over tunic (views A, B, or C). But even the under tunic (view D) was not that close fitting, or it wouldn't have fit me without an FBA.

I made the under tunic first. As I mentioned, I cut out the size 22 and made it without any alterations – no FBA for Shams! The seams are relatively straight and the fabric is quite sheer, so I used French seams. I omitted the sleeves and left the neckline and hem edges raw. It fit me nicely, especially over the bust. The armscye was nice and high. Wow, this is the second McCalls in a row that I have made and both have been drafted with nice, high armholes. Very impressive.

Just for fun, put this top on over a bra and pants. Wander into teenage daughter's room and ask, in all seriousness, if she thinks it will work for your upcoming vacation to warmer climes. You know, the vacation where you are also taking her guy friend? ;)

Here you can see the front and back French seams for the side panel.

Before I cut out the over tunic (in an XL), I made several changes to the pattern. Because I like the fit of my Marcy Tilton tunic, and I wanted the over tunic to have sleeves, I transferred the armscye from the Marcy Tilton tunic to the McCalls pattern. I then used the Marcy Tilton sleeve (I have used this sleeve many times now - I really like the fit of it). I also raised the neckline a bit.

The over tunic was fairly quick to sew up, but the fabric was a bit of a pain. This is one of those very fragile cotton jerseys that sticks to itself, and loves to curl, or snag, at the drop of a hat. It was difficult to lay out, because of the "sticking." Because the seams are curved, I serged them rather than bothering with French seams. To hem it, I serged the raw edge and then used yards of Steam a Seam 2 Lite. For the neckline, I used a reverse binding, so the raw edge of the binding curls on the outside of the tunic. (There is a picture of this below.) So, it wasn't hard to construct, but the fabric required special handling.

In the end, I still made a novice mistake. I neglected to pay attention to the giant, lacy floral motifs. I cut the fabric on the fold and, of course, one of the motifs ended up right on my left bust. I decided I don't mind too much. ;)

Instead of a giant bow, I have a giant flower on my left breast. Thank goodness it's lacy!

"Close-fitting," McCalls? Really?

Close-up of the reverse binding and of my 26-year-old thyroid surgery scar. To make the binding: I cut a strip 1-1/2" wide and sewed it to the inside (right side of binding to the wrong side of the neckline), with a 1/4" seam. The binding was then folded to the outside, and stitched in the ditch, from the inside, making sure not to catch the roly poly raw edge on the front. The remaining raw edge curls up decoratively.

Wednesday, July 14, 2010

Fall Vogues are Out!

I want to thank everyone for your kind comments on my wild trench coat. It is nice to have a well fitting coat in one's wardrobe.

Did you hear it? Early yesterday, the call went out, and it rippled, like waves growing larger and larger... the fall Vogues are out!!!

I couldn't get to the Vogue website fast enough. I was especially looking forward to any new Marcy Tilton or Miyake patterns, but I was surprised to see so many great patterns across the board. Usually when the new Vogues come out, some niche audience is not happy with the offerings, but this selection has designs to please everyone. I've been reading reviews on other blogs, and they cover the fitted dresses, skirts, and designer patterns, but tend to ignore the patterns I like. So here is my report. :)

First up, Vogue 1024, the new Issey Miyake. I really like this design! I think Terri K pointed out that this top resembles the out-of-print Sewing Workshop Elle jacket pattern. Even the pants look promising, though I would use a quieter fabric. With the neckline that extends directly over the bust point, it's dubious that the top would work on my frame without some major modification, but it's a great look for the right body type. Be sure to study the line drawings to see how interesting this piece is.

I love this new Marcy Tilton jacket! It might be my favorite pattern of the batch. I'm grateful that it has no horizontal seams near the bustline which can be so problematic for me. I have several fabrics that would work for this and I can imagine grabbing this jacket on most any chilly San Francisco day.

From Vogue

Next, another Marcy Tilton twist on the t-shirt, Vogue 8671. I especially like View A, with the asymmetric neckline also echoed in the asymmetric hem. And the vertical design line on the left should have a slimming effect. View A also features side seam slits, another flattering detail. I like the architectural hemline of Views B and C, with the squared piece that hangs below the rest of the hem. The hem of the sleeves on View B and C also feature an outside dart - I like! Vogue describes this pattern as close fitting, so I would expect to sew this up in my actual size, or close to. (Some of her previous t-shirt patterns had generous ease, but the fashion trend continues to move closer to the body and these new patterns seem to reflect that trend.)

Next is Sandra Betzina's new jacket pattern, Vogue 1198. So cute! This jacket has armhole princess seams, but also features vertical seams to the shoulder, and the zipper is inserted into one of those vertical seams, so it has an asymmetric closure. All those seams mean you can achieve just the right fit. I just love the overlapping collar – one of my favorite coats in the House of Elliott series featured a collar like that, so it's been on my mind. The gathered belt in the back is a cute design detail, but I would omit it since even my back waist is not worth showcasing. But if you have a waist, this would be a great detail. I would probably make view A, which has zippers in the hem of the sleeves. Tres chic!

The final pattern I want to mention is one I may not buy, but I keep coming back to it, so it may jump into my cart. Vogue 8677 is a suit, and I really don't have a need for a fitted suit in my life. But see those sleeves? You must have heard that focus on the shoulder is returning, and this pattern certainly reflects that. It is reminiscent of the 80s, but a more modern silhouette. When I look at the pattern, my eyes are first drawn to the shoulders, and that is a Good Thing – most of us with more mature figures don't want the eye drawn to the bust, or the waist, or the hips (choose your poison). This pattern is an "almost there" for me. I would leave off the decorative closure and the giant pocket flaps, which do bring the eye to the waist. I like the princess seams and would fit the pattern so that it wasn't so close fitting. Finally, I might remove the notch at the collar so that it was connected to the jacket front with a straight line. But I would keep those fabulous sleeves. I might buy the pattern for that detail alone. After all, it's not that difficult to transfer an armscye from one pattern to another, and then you can use the sleeve without any trouble. :)

I guess my only disappointment is that there are no new funky pant patterns. It's a small complaint, to be sure, but I hope to see some in the next batch...

So, when is that next Vogue pattern sale????

Sunday, July 11, 2010

McCalls 5525 - Trench Coat

I mentioned in a previous post that I have caught Trench Coat Fever that seems to be epidemic. I've never been interested in the classic Burberry-style trench coat, but lately trenches are everywhere, and some feature interesting details. I started thinking that I needed a trench coat too, and, suddenly, I was seeing trench coats wherever I turned.

I finally decided the time was now and I allocated the bulk of the July 4th weekend to tackle the project. So many great trench patterns are now out of print, but McCalls 5525 was voted one of the Best Patterns of 2009 by readers of Pattern Review, so who am I to argue with success? I read all of the 25-or-so reviews of the pattern before starting my own.

For my fabric, I used a cotton/lycra blend from FabricMart. It was from the Vera Wang collection and this fabric is a dream to sew. It is so substantial that, at first, I thought it was a twill, but it's a plain weave and it does ravel, but not crazily so. It is very beefy, but not stiff, and the stretch from the lycra is a bonus. This fabric sews like buttah. For the lining I used a synthetic from Fabrix woven with a diamond-shaped design. For the pockets and bias trim, I used a polyester charmeuse, also from Fabrix, using the shiny side for the pockets, and the dull side for the bias. The belt uses a black stretch pique from Emma One Sock.

The pattern is described as semi-fitted and it is definitely fitted through the bust. I made a size 22 and still added a hefty princess FBA.

I made view D (mid-thigh length), with the sleeve from view A. Because this is a very bold print, I left off all the regular trench details: epaulets, front shield, back yoke, button bands. (Question: if it lacks all that trench detailing, is it still a trench?) But, to be honest, I would have left off that detailing anyway. I did make a muslin, after performing a fairly hefty princess seam FBA (more about that in the alterations list), and then I made further tweaks.

I did not omit the belt. Why, you ask? Why would a waistless wonder who has no intention of ever belting the coat, go to the bother of sewing a belt and belt loops? Well, I plan to wear it tied behind the coat, and my thinking is that the contrast black belt would cinch in the back and help create a flattering line. And, if I decide I don't like it, it's simple enough to remove. :)

The following list details my alterations as well as my construction notes:

  • Removed some of the shaping from the front and back side seam at the hip. After the outer shell was constructed, I further tweaked the side shaping by removing about 1/2" from the waist at the side seam (for a total reduction of 2").
  • Narrowed the shoulder about 1".
  • A Princess FBA on the side panel. I followed the instructions in the Palmer/Pletsch Fit for Real People, page 151, Adding to the Side Panel, which are excellent!
  • I shortened the sleeve 1-1/2".
  • Various reviewers on Pattern Review have mentioned that the pocket is small. The pocket is ridiculously small. I think this was intentional – the pocket is inserted into the front princess seam, so they probably thought it was better to make the pocket small, so when the wearer has her hands in both pockets and the coat is closed, the hands won't "overlap". Me, I don't care. I redrafted a considerably larger pocket.

    Their pocket laid over my pocket.

  • I sewed the side seams, the center back seam, and the front and back princess seams with 3/8" seam allowance to give myself extra room. I tapered to a 5/8" allowance at the neckline and armhole so the collar and sleeves would fit without problems. Of course, I did this on the lining as well as the outer shell.
  • The instructions have you interface the entire front with sew-in interfacing. My fabric was quite beefy, so I didn't bother.
  • The instructions have you interface one layer of the collar and stand with sew-in interfacing. I used fusible. I did interface the outer collar, as directed, and but I also interfaced both the outer and inner collar stand, because I want the collar to really stand up and not become floppy over the life of the coat.
  • The instructions call for 3/8" top-stitching. I don't care for such wide top-stitching, so I used 1/8".
  • The instructions do not mention it, but I graded the seams where necessary – particularly the collar seams. I also allowed for the turn of collar, also not mentioned by the instructions.

    One of my favorite pressing tools, the Tailor Board, by June Tailor. No longer being made, you can still track these down and it's worth every penny. All the various edges let you press every little corner or curve you might ever encounter.

    A well tailored collar is a joy forever... or at least a joy when you wear the garment. :)

  • I made sleeve heads from muslin and Pellon fleece. I also used 1/4" shoulder pads - the shoulder pads were listed as optional.
  • I applied a 1/2" bias binding around the entire outer edge of the jacket and both sleeve hems. This was rather painstaking work, because there were two outer curves, one quite sharp, and an inner corner. The black binding gives the print some structure.

    The bias binding, isn't perfect, but if anyone starts scrutinizing me that closely, I might have to tweak their nose. ;)

  • I narrowed the belt to 2" and made it several inches longer. I used a black pique fabric and channel stitched it to give it some additional body.

    The pique belt with channel stitching completed.

  • I used a single column of buttons, so the closure is asymmetric. I think this is hard to see in the busy print.

What do I like about this pattern? It is well drafted. The princess seams go together well, the sleeve cap has the right amount of ease. Once I did the FBA, I was extremely happy with the fit, especially around the bust and armhole – no gapping whatsoever. I especially like the fact that there is one pattern piece for the front panel and for the front facing, as well as for the side front and the side lining. This meant I had only to apply the alterations once – usually I would have to repeat the alterations on the lining pattern pieces and hope I got them exactly right. This was a huge plus for me. The only separate lining piece is the center back.

What would I change next time? When you attach the lining to the outer shell, there is a 1" pleat at the bottom of the hem for wearing ease, which is what you would expect. But there is no similar pleat at the bottom of the sleeve. I think there should be, so the coat would be easier to wear and the sleeves would look better.

Progress at the end of the July 4th weekend.

By the end of the long July 4th weekend, I had the outer shell and lining constructed. I worked on the coat two or three evenings, but I spent this weekend finishing. The bias binding took me most of Saturday. I finished the coat at 2pm on Sunday (today), then took a nice, long nap. I took the photos, by myself, this afternoon. Can I say how much I love being able to take photos on my own? :)

Buttoned up

Collar up. So dramatic!

Unbuttoned. The general consensus of both daughters is that it's more flattering buttoned and unbelted. :)

Back, with the collar up, and the belt tied jauntily in back.

I know that most of the country, at least east of the Mississippi, is suffering from a heat wave. I wish I could send you some of my weather. Here, it is foggy and chilly – true San Francisco summer weather. I had to lighten these photos because it is rather dark from the fog, even though they were taken at 5pm. This trench coat will get immediate use!