Thursday, September 23, 2010

Sewing Workshop - Now Jacket

I first made the Sewing Workshop Now top last March. Around the same time I scored some of this Nani Iro fabric. If you aren't familiar with the name, Nani Iro fabrics are designed by Japanese artist Naomi Ito. Her designs are very graphic and very collectible – the fabric and notion equivalent of Beanie Babies (way back when), at least for some folks. I bought several pieces of her fabric from Korea by mail order early this year. The other pieces I purchased are Japanese double gauze - I love Japanese double gauze. This particular piece was advertised as cotton/linen, so I expected it to have a bit of drape, but when it arrived I was surprised how stiff this fabric is - almost like an upholstery fabric. I might venture to guess that the inks used to saturate the fabric added to its stiffness.

Nani Iro cotton/linen

I went ahead and washed/dried the fabric and, other than some stubborn wrinkles, it was fine. I wanted to use a design with minimal seams, so as to disturb the print as little as possible. Of course, this has the disadvantage of requiring a giant dart - not my favorite look, but oh well. I decided to use the Now pattern, but this time to make it so that I could wear it as a light jacket.

I actually made this jacket last spring, but didn't finish it and so I didn't blog it. (Meaning I am a bit vague on some of the details.) For this version, I lengthened the pattern a bit. (I can't remember exactly how much.) I put side slits at the hem. I bought some orange buttons for it but I cannot find them anywhere, so for now, I am wearing it without buttons. :) I finished most of the seams with French seams.

I also mused that it would look nice with curved welt pockets and some lightweight shoulder pads, but never followed up with either. Who knows, I may go back and tweak it more later.

I'm wearing it today because of Self Stitched September and because it's a warm day. In fact, I hemmed it last night, so this is the first time it's been worn.

The cream top is Christine Jonson's v-neck tee, which is a pattern I've made twice but haven't blogged - I still haven't tweaked it to my satisfaction, but it's fine to wear under other things. The pants are my white linen Trios, which have been washed and dried several times and are almost impossible to iron with those 3D pockets, so they are a bit rumpled. :)

From Sewing Workshop Designs

Tuesday, September 21, 2010

Vogue 1018 - Sandra Betzina skirt #5

I liked this skirt so much, I made it four times in late 2009. For example, here and here. I made this particular version in January 2010, using fabric left over from this Au Bonheurs skirt, but I didn't get around to blogging it. For this version, I cut the unusual striped fabric on the bias and omitted the drape. I made sure all the tucks were on the "gray" wide stripe. I also increased the angle of the hem.

I'm finally blogging it today because I'm wearing it for Self Stitched September.

I also knitted the scarf, though it was several years ago. I used a skein of Nepalese silk sari "leftover" yarn, cast about 16 stitches onto largish needles, and knitted in stockinette until the skein was gone. (The scarf curls in on itself.) I then sewed little felted balls to the ends – sort of a funky fringe. I got the idea from Renee, a very creative friend of mine. :)

By the way, I chose that yarn link at random, I bought mine from a local knitting shop. I got a bag of felted, oblong balls from either the Hearthsong or Magic Cabin online store several years ago, I can't remember which.

The skirt pattern is one of my favorites and is now out of print, but shouldn't be too hard to get a hold of.

Saturday, September 18, 2010

Territory Ahead Cascade Skirt

Last year on Stitcher's Guild, someone mentioned this great skirt on Territory Ahead, called the Cascade skirt:

This skirt is similar to the Sewing Workshop Lotus skirt:

But the Territory Ahead skirt is also similar to a a slit style circle skirt that I drafted last year:

In fact, it is almost identical to one-half of that skirt! But I am getting ahead of myself...

I decided to try to reproduce the Territory Ahead skirt, based on the photo on their website - I have not seen the skirt in person. It is basically an a-line skirt with a side drape and lined to the knee (based on one review that was posted). I played with the design in a small scale, using fabric scraps. Once I had the design figured out, I then realized it's pretty much the same as the slit circle skirt I drafted last year. Here is what the main pattern piece looks like (I neglected to add a grainline to the sketch, but the grainline runs perpendicular to the top of the skirt):

You cut two of these pattern pieces and sew the a-line side. You then sew the portion marked as "waist" (see the diagram), to the bottom of a yoke. My yoke is straight across at the bottom, but it doesn't have to be - you trim off any unevenness later when you mark the hem. I used a rectangular yoke with an elastic waistband, but if you prefer a fitted yoke with darts and a zipper, you can use that instead. You make the yoke as wide as you want, but I made mine about 4" from the bottom of the waistband to the skirt, because that placed the side drape on the hip where I liked it best. I also liked the selvedge on the fabric, so I sewed it to the outside of the yoke and let the selvedge edge form the side of the drape. But you could construct it more conventionally, if you don't want the selvedge edge showing.

Because the drape is not stitched together, it can fall open, revealing a lot of leg. So the skirt is lined to just below the knee. I used the same a-line shape that I used on the skirt (the non-draped side) and cut it out of a semi-sheer crinkled polyester from Fabrix. I left the bottom edge serged.

Inside out, showing the lining. The skirt is listing a bit to the side due to the weight of the drape, but it does not pull on the body because the fabric, a cotton rayon blend from Fabrix, is not that heavy.

Another peek at the lining.

When I drafted the skirt, I did not worry about the curve of the hemline. I just ignored it. After I sewed the skirt up last Sunday, I hung it for almost a week before hemming it this morning - I would recommend hanging it a bit because the drape is on the bias. When it came time to hem it, I pulled out DD2's punching bag, placed it upside down on a box, and put the skirt on it. The punching bag has a depressingly similar waistline to mine. I was then able to pin in a straight hem and to cut off the excess at both sides. Of course, a dressform would work even better. :)

My Impromptu Dress Form

Will I make this again? Yes, I really like this skirt. Because it is an a-line, it is easy to wear and move in - there is not too much fabric at the hem to get tangled around your ankles. It requires a drapey fabric, but not one that is too heavy or you might start to list to one side as you walk or it might pull on the skirt too much. The lining gives you the modesty you might require. All in all, it's a great design!!

Here you can see the overall shape.

Pattern Giveaway in Honor of Fred Bloebaum

On September 4th, the world lost a bright light when Fred Bloebaum passed away after a short, but valiant, struggle with pancreatic cancer. I have a few memories of Fred from twenty years ago when Sewing Workshop was my second home. I took many classes there from Marcy Tilton, Sandra Betzina, Kenneth King, and Candace Kling (to name a few), and I remember Fred as one of the teachers there, always dressed immaculately in the most gorgeous self-made clothing, though I never took a class from her. I remember coveting a cropped jacket she had made, a Vogue pattern it was, in rust. It was to. die. for. I also remember an Issey Miyake jacket she made that I covet to this day - I can still picture it. Her workmanship and taste were impeccable. We spoke once or twice at Sewing Workshop functions, and I remember her as a thoughtful, well spoken, focused, and elegant woman.

I stopped sewing garments for many years and turned my attention to other things. When I returned to sewing, I was delighted to see that, in the intervening years, she had launched a serious sewing business, with her own pattern line, and was traveling the country teaching. Touching so many lives.

I was even more delighted, on returning to my old sewing group, to see that she was now a member. She immediately approached me to introduce herself at the first meeting we both attended - I am a bit shy when it comes to these things, so it would have taken me awhile to approach her. She had that way of really looking at you as she spoke, really giving you her full attention. (Those of you who know me can stop snorting. I was feeling shy that day. :) )

Yesterday I attended Fred's memorial service. It was the most moving service I have ever attended. Fred was so loved and the memorial really captured who she was. It was touching to hear many friends and family speak. Many of her friends had been friends for decades, and most of them highlighted how she valued relationships, how she built and fostered relationships. It was especially touching when her husband and son spoke. It was funny too, for example, when her husband, in an effort to give "balance" to all the praises being sung, said that she had flaws too. For example, "she criticized my driving."

I am so sorry I will not have the chance to get to know her better, but I'm glad that my life intersected with hers, even briefly.

I recently bought a few of her patterns. (I have made a couple of her patterns in the last year, but there were many I hadn't yet purchased.) I thought I had purchased two of them already, but I couldn't find them, so thought I must have been mistaken. And, then I found them. I now have duplicates of two of her patterns.

In honor of Fred (which, by the way, is not short for anything, it's a nickname given to her by a college boyfriend when he wanted to call her Red and she objected to anything so prosaic, so he dubbed her Fred and it stuck), I would like to give these patterns away. One is the Daphne pant, which many sewists I know claim to be one of the best fitting pants ever. The other is the Maia jacket, which I just love. Both patterns run from size 6 to 26. This giveaway is open to international folks, because Fred's designs should be enjoyed everywhere.

If you are a follower of my blog, and would like a chance to own either of these patterns (I will give them away separately), leave a comment on this post telling me which pattern you would like and I will do the random number generator thing. You have until next Saturday, September 25th, otherwise known as Artistry in Fashion Day, to enter (by noon PT). It was at the last Artistry in Fashion day that I first saw Fred after 20 years, so this seems apropos. At last year's AIF, she gave a fashion show featuring her designs and a presentation on her line. I bought a couple patterns from her that day, both of which I have sewn up.

By the way, Fred's patterns are still available from several sources, including sewingpatterns.com. I have not heard if they will be reprinted, but I would not count on it.

Welcome, Marcy Tilton Fans!

I returned from the service yesterday and had received a couple emails telling me that Marcy had featured my blog in her most recent newsletter. What a nice surprise! I love Marcy's designs, and I've been a Marcy fan since she opened the Sewing Workshop, many years ago. And if anyone recognizes me at Artistry in Fashion, please say "hi!"

Finally, I have been quiet on the blog, but I have been participating in Self Stitched September, where I wear clothing I made every day for the month of September. I will post an analysis at the month's end, but you can see my progress on my SSS 2010 Flickr set, which is part of the Self Stitched September 2010 Flick group. I pretty much wear self-made clothing anyway, but for this challenge I have been mixing it up more, wearing clothes that don't often see the light of day, all of which I've made in the last 13 months. It has been a very educational experience.

Monday, September 6, 2010

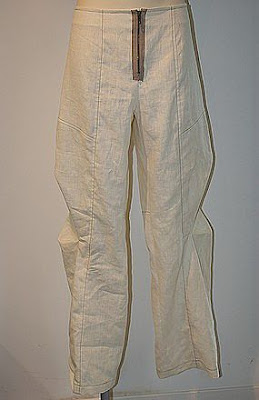
Au Bonheur des Petites Mains - Pants with Side Tucks (PL000001)

Sorry the pose is a bit weird, but it was hot and I was in a hurry. :) This pic shows the pant silhouette the best.

Time for another Au Bonheurs pattern! I do tend to spread these out, don't I? :)

I made this intriguing design using my beloved black ponte from Fabrix. (I bought 50 or 60 yards of this for $2.39 a yard and resold, for the same price, much of it to fellow sew group friends. I think I sold too much of it, though, cause I'm getting low! ;) )

The pattern is designed for woven fabrics and calls for an invisible zipper. (The photo on the website is made from what looks like a white linen and has an exposed zipper, but the photo on the pattern itself is made from a black fabric with an invisible zipper.)

I made a size 46, which is the largest size on the pattern. To be honest, though, I could have made a smaller size because the pants are fairly roomy through the hips, especially in the ponte. I made minimal changes to the pattern this time - I enlarged the waist and used elastic waistband instead of a zipper. I had to shorten the pants about 2.5", but I did this after construction, since the legs are straight tubes at the hem - the shaping happens higher up. I cut the pants with extra length at the top to ensure that the crotch was long enough and I just cut off the excess before attaching the waistband.

I am wearing these with a new top. This is Teagarden T #5, made with a ponte from Fabricmart. I really like these pants and they remind me, just a bit, of Vogue 8397A, from Marcy Tilton, one of my favorite pant patterns.

For those of you who want to make these, here is my translation of the instructions, though of course I didn't bother with the zipper or facings:

  • Sew the tucks on the side bottom (3) by placing the X mark on top of the O mark and fold the tuck towards the top or the bottom, as indicated by the arrows. Secure with pins.
  • Sew the side bottom (3) to the side top (2), following marks C and D. Turn the seam allowances up and topstitch the width of the presser foot.
  • Sew the front (1) to the side starting at mark A, turning the corner. Turn the seam allowance towards the side and topstitch the width of the presser foot.
  • Sew the back top (4) to the back bottom (5), according to marks E and F. Turn the seam allowances up and topstich the width of the presser foot.
  • Insert the invisible zipper in the center front crotch opening.
  • Sew the rest of the crotch seam.
  • Sew the inseam.
  • Interface the facings. Sew the back facing (7) to the front facing (6).
  • Sew the facing to the waist, right sides together. Turn the facing to the inside and topstitch the width of the presser foot.

I just noticed that this pattern is on sale for 8 Euros (regularly 11.50 Euros), so maybe it will be discontinued soon?

Monday, August 30, 2010

Jalie 2908 - Blue Jean Goodness!

First, thanks to each of you who posted on my first blogiversary entry. I truly appreciate all of your comments and feedback – it definitely motivates me to keep posting. :)

I managed to surprise myself by exercising a little self discipline – I focused and I made myself a pair of jeans! Phew, jeans are a lot of work, but there is a certain satisfaction too, especially since the RTW brand I most recently purchased cost over $100 and tends to throttle me through the waist.

For some time I have been accumulating supplies and patterns for the Jeans Project. I initially planned try the current Sandra Betzina jean pattern, Vogue 1034. A month or two ago I spread the pattern out and laid my one pair of (fits-well-through-the-hips-but-strangles-the-waist) Not Your Daughter's Jeans (NYDJ) jeans on top. Wow. Even the smallest size on the pattern was much larger than my NYDJ jeans, and the shape was quite different. So I put that pattern away and ordered three patterns that have received excellent reviews online.

Left to right: Vogue 7608 (OOP), Jalie 2908, J. Stern 0037

For those not familiar with Jalie patterns, they are from Canada and they contain all sizes (from young child to plus-size adult) in one envelope. For example, the size range for the jeans was girls size 2 to size 13 and women's size 4 to size 22.

I bought a couple pieces of indigo stretch denim from JoAnns and Fabrix, and one piece in white from Emma One Sock. I searched, high and low, for a nice stretch black denim, to no avail, though I did buy some black knit "denim" from Emma One Sock, perfect for jeggings. I washed and dried all of the fabric pieces multiple times. I also purchased Wonder Tape (for the fly front, as per Debbie Cook's tutorial, though mine was sold by Dritz), a good quality metal zipper, blue jeans rivets and buttons (from Junior), a cute cotton print for the pocket lining (purchased for a couple dollars in San Diego), Gutterman top-stitching thread in several colors, and sewing machine needles specifically for jeans.

In the end, I decided to start with Jalie. This pattern has become quite famous and, as of this writing, has 70 reviews on Pattern Review, many of them positively ecstatic about this jean. I didn't read many of the reviews (it was a bit overwhelming), but I did scan through the photos to see if anyone who made them had my particular shape. I couldn't find any. Typical. ;)

I traced off a size V, View B (regular rise), based on my 40" hip, but I increased the waist considerably and I shortened the leg at the knee by 1". I made up a quick and dirty muslin of one leg only. I was using what was left of an old, holey flannel sheet and I didn't have enough for the entire pants, so I made one leg. The leg was fairly fitted through the knee, and the length seemed ok (it was rather hard to tell), but, wow, what a wedgie it gave me! I decided that I needed to muslin both legs, so I used what remained of the sheet to muslin a short version of the pant, but one that went all the way around. Again, what a wedgie!!!

It was about this time I realized I had omitted the back yoke from both muslins. lolol This shortened the crotch length by several inches, so no wonder I was experiencing a wedgie.

After both muslins were complete, I altered the pocket yoke, pocket lining, pocket facing, back yoke, and the waistband to accommodate the new waist shaping, and cut them out of a stretch denim, giving myself another quarter inch of fabric on each side of the knee where it was most tapered (front and back - a 1" increase total). I think this denim came from JoAnn's, though it might have been Fabrix. I would guess that it is an 8-9oz denim with 3% spandex. The denim is definitely a bit lightweight but had the most stretch of my available pieces, so I wanted to start with that. I have read that before cutting a stretch fabric like this, it's best to let it relax on the cutting table for awhile before cutting it out. So I did.

Before I cut my jeans out, while the fabric was busy kicking back and "relaxing", I rummaged through DD1's pant drawer. I pulled out all of her jeans, jeggings (leggings made to look like jeans), denim skirts, jean shorts. Sheesh, there must have been 15 different garments in all, and she tells me she has more at her dad's house. Previously, I had stopped by my local Goodwill Boutique and looked at their rack of upscale jeans (for $20-$30 a pair). I studied back pockets, belt loops, front pockets, coin pockets, top-stitching. The variety is so interesting, but so is the uniformity. For example, out of my daughter's 15 jean-style garments, all but one had a coin pocket. All of the coin pockets were 2 1/4" wide, except for one that was 3 1/4", but that one was a welted pocket, not a patch pocket.

In the end, I decided to leave off the coin pocket, which isn't included on the pattern anyway, not to mention that I've never used a coin pocket - my stubby fingers can't possibly retrieve coins from that narrow little opening while plastered against the body, though I guess I could take my pants off to retrieve the pocket's contents. ;) I also decided to keep the back pocket plain, but I enjoyed all the creative variety I saw in RTW.

After much deliberation, I decided to topstitch with the classic gold-colored, heavy thread. I generally like my top-stitching to match, so this was a bit outside my comfort zone, but these are jeans, for heavens sake, and I felt I should get with the program. I used two spools of Gutterman top-stitching thread (color: 865) and I set up a second sewing machine just for top-stitching. (More about the machine in another post.) I also used my serger to finish the seams, so this project had me running between three machines set up in two rooms. Because the gold top-stitching was so bold, and I was using a machine that was unfamiliar to me (so I kept making mistakes that were quite obvious), I did a fair amount of ripping - more than I can ever remember doing for one garment.

This was my first Jalie pattern and the instructions were... deficient. I can't remember the last time I made a fly front (but it's been over 20 years), and it was difficult to make sense of the Jalie instructions/diagrams, so I referenced Debbie Cook's excellent Jeans Fly Tutorial, which I hope is always available on the web. As recommended in her tutorial, I used the same cotton fabric for the fly shield as for the pocket lining. She doesn't mention this detail, but when it was time to attach the waistband to the pant, I used the wire cutters (from my jewelry-making supplies) to remove the zipper teeth from the seam line and waistband seam allowance. That way I didn't have to worry about breaking a sewing machine needle or the added bulk.

Even though I don't plan to wear these with a belt, I included belt loops. How else can I pull my pants up? :) If you follow the instructions you will end up with a few raw edges. For example, the back of the belt loops are left raw, so I used Fray Block in those instances to secure the edges. (Had I thought of it, I would have serged one long edge of the belt loops beforehand.) The front pocket yoke was sewn to the pocket lining with a 1/8" seam and left raw - so I zigzagged over that edge.

The pocket yoke is stitched to the pocket lining with a 1/8" seam. After taking this picture, I zigzagged around the raw edge of the denim.

In the end, I didn't use the rivets or jeans button from Junior. My denim was too lightweight and, after trying a sample, I realized I would have to cut down the nail portion of the rivets and the button. I was determined to finish these jeans by Sunday night, and it was more effort than I wanted to expend, so I sewed on a 10 cent brass button from Fabrix and called it a day.

I have to say it - 70 ecstatic reviewers aren't wrong. These are great jeans. My only alteration after they were constructed was to cut another inch off the bottom. The jeans fit, they are amazingly comfortable, they are flattering, and they are wedgie-free! DD1 gave me a very enthusiastic thumbs up and especially loved the pocket/fly shield fabric. I had planned to make a white pair for the summer, but since we are now entering fall, I may just wait until next spring. When I told DD1 that I wanted to make a white pair she said, "How 80s!"

Hmm... Is that a bad thing? :)


Wednesday, August 25, 2010

First Blogiversary!!!

It was exactly one year ago, on August 25th, 2009 that I returned to sewing garments and simultaneously started this blog. Rather than look back over the year on Dec 31st, when I'm really too busy sewing to take stock, I thought I would do that on my blogiversary.

Over the last year I've sewn clothing for myself. A lot of new clothes. But how would I summarize the last year, sewing-wise?

Well...

  • I have been developing a stable of TNT (Tried 'N True) patterns. Probably my favorite top is the Sewing Workshop Teagarden T, which I have made 4 or 5 times. My favorite pants are most anything
    by Marcy Tilton - I've made about 5 pair using three of her patterns. I also love the Sewing Workshop Trio, which I have made twice, but I often migrate the crotch curve from the Trio to other patterns. My favorite skirt is probably the Sandra Betzina skirt I have now made about 5 times.

    Teagarden T with Trio pants.

    Marcy Tilton pants - Vogue 8397, view A. The top is another Teagarden T.

    Sandra Betzina skirt - Vogue 1018 (recently OOP)

  • I have dusted off my drafting skills.


  • I've gotten better at figuring out what flatters my body. This is from early in the year:

    Quel Tragique! Funky and Frumpy!

  • I've also gotten better at modeling/composing a photo. (Though it still may be the hardest part of the entire sewing process... :) ) These are also from early in the year:

    <cringe> I so hope these tops look better in person! ;)

  • I have built a stash. (Uh oh.)
  • I've had fun with the French Au Bonheur patterns! (In fact, last night I translated another pattern that you may be seeing soon.)


  • I've played with new techniques.


  • I've written 124 blog posts (this one makes 125).
  • I now have 130 of the greatest blog followers ever. Thanks to each of you for reading and giving me feedback. I really appreciate all of you!

So, what's planned for next year? Well...

  • More jackets and coats!
  • More tops! With my figure, good tops are a particular challenge.
  • More pattern drafting.
  • More new techniques. I have some ideas, including one that uses Texture Magic.
  • Jeans! (I have to really buckle down!)
  • More wonderful funkiness, but it has to be funkiness that flatters my figure. :)

Yesterday, I took my teen aged daughters to the beauty college for back-to-school haircuts/coloring. I got one too, just in time for Self-Stitched-September. Cuts for three and hair coloring for one came to $130 - such a deal! (Especially since I had DD1 pay for her red tresses.)