

Drafting Instructions
- Start with a well fitting dolman sleeve top.

- Hold the pattern up to your body and decide where you want the knot. Make a mark, shown on the following diagram as point A. The knot is located at this point and this is where the seam will be.

- From point A, end the CF line approx 2 1/2" above that point. This may mean drawing a higher neckline, or it may mean lowering it. The image above shows the neckline being raised (see the dotted line). The new neckline is marked by point C. The distance from point A to point C is 2 1/2".
- Draw in the seam from CF to the side seam/underarm. Precisely where to end this seam at the underarm is a judgment call, but the Burda pattern places it about where I have shown.

- Mark point D, about 2 1/2" inches from CF on the new seamline.

- Trace off the two pattern pieces: upper front and lower front. Make sure you maintain point D on both pieces.

- Adjust the CF line on the upper front: extend the neckline 1/4" from CF and taper that line back to the original CF. The drawing shows the original CF line with a dotted line. The solid line is the new CF line. This adds a bit of extra fabric at the neckline to accommodate the twist.
- Mark point E on the lower front. If you look at the photo of the Burda top, they located point E so low that it exposes the bra. (She must not be wearing a bra, but trust me on this one.) I suggest you make that point much higher, maybe 1.5" from the top of the pattern piece.
Cutting Instructions
This pattern assumes a knit fabric, since the fit of the original t-shirt assumes a knit fabric. The stretch needs to go around the body. It might be hard to find a fabric wide enough to cut the back and upper front pattern pieces on the fold. In that case you can shorten the sleeves, or you can use a 4-way stretch and cut the pattern across the grain. (I believe this is exactly why Burda didn't provide the pattern in a larger size.)- Back: Cut one on fold.
- Upper front: Cut one on fold. Make sure you transfer mark D with a snip in the seam allowance.
- Lower front: Cut two. Make sure you transfer marks D and E with snips in the seam allowance.
Construction Instructions
I have made this top a few times now and I found I prefer a different order to the instructions as those provided by Burda, which are pretty terse. (One of the reviews of this pattern on Pattern Review shows the Burda order.)This is how I construct it:
- Finish the neck edges of the front and the back.
- Sew the CF seam on the lower front, from the hem to point E. Press the seam open.
- Sew the left bottom front to the left upper front, stopping at point D.
- Twist the upper front 360 degrees.
- Preserving the twist, sew the right bottom front to the right upper front, stopping at point D. It should look something like this:

- Form the knot: Place the top corner of the right front under the twist. Twist the top corner of the left front over the twist. Line up the CF to CF, right sides together, and stitch on the sewing machine as far as you can go to point E.

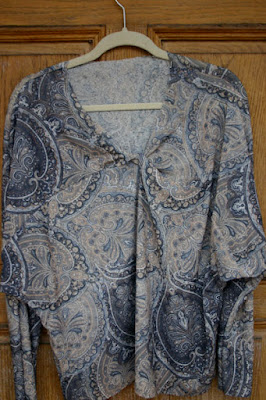
- The finished knot should look something like this:
(This is my muslin, so I have not finished the neck edge.) The front is now completely constructed. The final steps are the same as they would be for any t-shirt.
- Sew the shoulder seams.
- Sew the underarm/side seams.
- Hem the sleeves and bottom.
This created a nice v-neck, but was a bit lower than I wanted. For a second draft, I would raise the location of the knot even higher. I would also move the seam a bit -- make it more horizontal over the bust.
That's it! It's pretty easy to draft this pattern and I hope my instructions haven't daunted or confused you.
If you make a top following these instructions, please let me know!


