Sunday, July 18, 2010

McCalls 6165 - Layered Tunics

I am a fan of the funky swing tunic with non-linear hem that has been available in upscale boutiques for some time now, but the style is now appearing on teens. For example, my daughter recently brought one of these home and she would not have worn this style even a few months ago. Of course, hers is more youthful with its cropped hemline and giant trompe de l'oeil bow, but don't fashion trends typically migrate in the other direction?

Twice I have made Very Easy Vogue 8542. Though I made the grey top only last August, it has seen serious duty and has become quite pilled and worn – I find myself thinking I should toss it, but then I wash it and put it right back into rotation. I haven't worn the red rayon version as much – it's a bit more formal.

I made another, somewhat similar, tunic by Marcy Tilton – Vogue 8582. I have worn it more than the red top, but less than the gray top. This one was made from a slinky fabric and I find I don't wear slinky fabrics as much.

McCalls recently threw their hat into the ring and offered their version of this style – McCalls 6165. This pattern has some interesting features.

  • It is designed to be layered.
  • There are three under tunics (views A, B, and C) with different necklines and sleeve lengths.
  • The over tunic (view D) is a tank style with an open neckline and a wider armscye to accommodate the sleeve on the under tunic.
  • The under tunics are similar in design to Vogue 8542, except they have no side seam – there is a side panel instead, but the overall silhouette is similar.
  • The Very Easy Vogue tunic has dropped sleeves and the McCalls pattern has set in sleeves - a design line I find to be far more flattering.
  • The over tunic is similar to Vogue 8582, except the side drape is on both sides and the drape is shorter and wider than the drape in 8582.

I decided I wanted to use this pattern for an expensive, sheer, cotton, single knit jersey I bought at Britex. However, I wanted to make a few changes:

  • I wanted to make the under layer using a black mesh knit I purchased as Fabrix and I wanted it to be sleeveless.
  • I wanted the over tunic to have the sleeves. This way I could showcase the pretty Britex fabric and use the mesh tunic strictly for modesty in the main body of the garment.

The sizing of the pattern seems to be off. It is labeled as a "close-fitting" design. The bust for a large is 38-40" and an XL is 42-44". My bust is 43" (high bust) and 48" (full bust). The finished bust measurement printed on the pattern for the over tunic was 41" (L) and 45" (XL). The bust measurement for the under tunic was 37-1/2 (16), 39-1/2 (18), 41-1/2" (20) and 43-1/2" (22). (Yes, the over tunic is sized XS-XL and the under tunics are sized 4-22.) However, when I pin fit the pattern tissue for the under tunic, it was clear that the size XL would fit me without adding an FBA, and my full bust measurement is 48". The over tunic is much larger than the number on the pattern tissue as well. At the bottom of the armscye, the pattern piece immediately veers away from the bust line, so it is very loose fitting, not close fitting at all.

To summarize, check the measurements before cutting! You may want to go down a size, especially for the over tunic (views A, B, or C). But even the under tunic (view D) was not that close fitting, or it wouldn't have fit me without an FBA.

I made the under tunic first. As I mentioned, I cut out the size 22 and made it without any alterations – no FBA for Shams! The seams are relatively straight and the fabric is quite sheer, so I used French seams. I omitted the sleeves and left the neckline and hem edges raw. It fit me nicely, especially over the bust. The armscye was nice and high. Wow, this is the second McCalls in a row that I have made and both have been drafted with nice, high armholes. Very impressive.

Just for fun, put this top on over a bra and pants. Wander into teenage daughter's room and ask, in all seriousness, if she thinks it will work for your upcoming vacation to warmer climes. You know, the vacation where you are also taking her guy friend? ;)

Here you can see the front and back French seams for the side panel.

Before I cut out the over tunic (in an XL), I made several changes to the pattern. Because I like the fit of my Marcy Tilton tunic, and I wanted the over tunic to have sleeves, I transferred the armscye from the Marcy Tilton tunic to the McCalls pattern. I then used the Marcy Tilton sleeve (I have used this sleeve many times now - I really like the fit of it). I also raised the neckline a bit.

The over tunic was fairly quick to sew up, but the fabric was a bit of a pain. This is one of those very fragile cotton jerseys that sticks to itself, and loves to curl, or snag, at the drop of a hat. It was difficult to lay out, because of the "sticking." Because the seams are curved, I serged them rather than bothering with French seams. To hem it, I serged the raw edge and then used yards of Steam a Seam 2 Lite. For the neckline, I used a reverse binding, so the raw edge of the binding curls on the outside of the tunic. (There is a picture of this below.) So, it wasn't hard to construct, but the fabric required special handling.

In the end, I still made a novice mistake. I neglected to pay attention to the giant, lacy floral motifs. I cut the fabric on the fold and, of course, one of the motifs ended up right on my left bust. I decided I don't mind too much. ;)

Instead of a giant bow, I have a giant flower on my left breast. Thank goodness it's lacy!

"Close-fitting," McCalls? Really?

Close-up of the reverse binding and of my 26-year-old thyroid surgery scar. To make the binding: I cut a strip 1-1/2" wide and sewed it to the inside (right side of binding to the wrong side of the neckline), with a 1/4" seam. The binding was then folded to the outside, and stitched in the ditch, from the inside, making sure not to catch the roly poly raw edge on the front. The remaining raw edge curls up decoratively.

Wednesday, July 14, 2010

Fall Vogues are Out!

I want to thank everyone for your kind comments on my wild trench coat. It is nice to have a well fitting coat in one's wardrobe.

Did you hear it? Early yesterday, the call went out, and it rippled, like waves growing larger and larger... the fall Vogues are out!!!

I couldn't get to the Vogue website fast enough. I was especially looking forward to any new Marcy Tilton or Miyake patterns, but I was surprised to see so many great patterns across the board. Usually when the new Vogues come out, some niche audience is not happy with the offerings, but this selection has designs to please everyone. I've been reading reviews on other blogs, and they cover the fitted dresses, skirts, and designer patterns, but tend to ignore the patterns I like. So here is my report. :)

First up, Vogue 1024, the new Issey Miyake. I really like this design! I think Terri K pointed out that this top resembles the out-of-print Sewing Workshop Elle jacket pattern. Even the pants look promising, though I would use a quieter fabric. With the neckline that extends directly over the bust point, it's dubious that the top would work on my frame without some major modification, but it's a great look for the right body type. Be sure to study the line drawings to see how interesting this piece is.

I love this new Marcy Tilton jacket! It might be my favorite pattern of the batch. I'm grateful that it has no horizontal seams near the bustline which can be so problematic for me. I have several fabrics that would work for this and I can imagine grabbing this jacket on most any chilly San Francisco day.

From Vogue

Next, another Marcy Tilton twist on the t-shirt, Vogue 8671. I especially like View A, with the asymmetric neckline also echoed in the asymmetric hem. And the vertical design line on the left should have a slimming effect. View A also features side seam slits, another flattering detail. I like the architectural hemline of Views B and C, with the squared piece that hangs below the rest of the hem. The hem of the sleeves on View B and C also feature an outside dart - I like! Vogue describes this pattern as close fitting, so I would expect to sew this up in my actual size, or close to. (Some of her previous t-shirt patterns had generous ease, but the fashion trend continues to move closer to the body and these new patterns seem to reflect that trend.)

Next is Sandra Betzina's new jacket pattern, Vogue 1198. So cute! This jacket has armhole princess seams, but also features vertical seams to the shoulder, and the zipper is inserted into one of those vertical seams, so it has an asymmetric closure. All those seams mean you can achieve just the right fit. I just love the overlapping collar – one of my favorite coats in the House of Elliott series featured a collar like that, so it's been on my mind. The gathered belt in the back is a cute design detail, but I would omit it since even my back waist is not worth showcasing. But if you have a waist, this would be a great detail. I would probably make view A, which has zippers in the hem of the sleeves. Tres chic!

The final pattern I want to mention is one I may not buy, but I keep coming back to it, so it may jump into my cart. Vogue 8677 is a suit, and I really don't have a need for a fitted suit in my life. But see those sleeves? You must have heard that focus on the shoulder is returning, and this pattern certainly reflects that. It is reminiscent of the 80s, but a more modern silhouette. When I look at the pattern, my eyes are first drawn to the shoulders, and that is a Good Thing – most of us with more mature figures don't want the eye drawn to the bust, or the waist, or the hips (choose your poison). This pattern is an "almost there" for me. I would leave off the decorative closure and the giant pocket flaps, which do bring the eye to the waist. I like the princess seams and would fit the pattern so that it wasn't so close fitting. Finally, I might remove the notch at the collar so that it was connected to the jacket front with a straight line. But I would keep those fabulous sleeves. I might buy the pattern for that detail alone. After all, it's not that difficult to transfer an armscye from one pattern to another, and then you can use the sleeve without any trouble. :)

I guess my only disappointment is that there are no new funky pant patterns. It's a small complaint, to be sure, but I hope to see some in the next batch...

So, when is that next Vogue pattern sale????

Sunday, July 11, 2010

McCalls 5525 - Trench Coat

I mentioned in a previous post that I have caught Trench Coat Fever that seems to be epidemic. I've never been interested in the classic Burberry-style trench coat, but lately trenches are everywhere, and some feature interesting details. I started thinking that I needed a trench coat too, and, suddenly, I was seeing trench coats wherever I turned.

I finally decided the time was now and I allocated the bulk of the July 4th weekend to tackle the project. So many great trench patterns are now out of print, but McCalls 5525 was voted one of the Best Patterns of 2009 by readers of Pattern Review, so who am I to argue with success? I read all of the 25-or-so reviews of the pattern before starting my own.

For my fabric, I used a cotton/lycra blend from FabricMart. It was from the Vera Wang collection and this fabric is a dream to sew. It is so substantial that, at first, I thought it was a twill, but it's a plain weave and it does ravel, but not crazily so. It is very beefy, but not stiff, and the stretch from the lycra is a bonus. This fabric sews like buttah. For the lining I used a synthetic from Fabrix woven with a diamond-shaped design. For the pockets and bias trim, I used a polyester charmeuse, also from Fabrix, using the shiny side for the pockets, and the dull side for the bias. The belt uses a black stretch pique from Emma One Sock.

The pattern is described as semi-fitted and it is definitely fitted through the bust. I made a size 22 and still added a hefty princess FBA.

I made view D (mid-thigh length), with the sleeve from view A. Because this is a very bold print, I left off all the regular trench details: epaulets, front shield, back yoke, button bands. (Question: if it lacks all that trench detailing, is it still a trench?) But, to be honest, I would have left off that detailing anyway. I did make a muslin, after performing a fairly hefty princess seam FBA (more about that in the alterations list), and then I made further tweaks.

I did not omit the belt. Why, you ask? Why would a waistless wonder who has no intention of ever belting the coat, go to the bother of sewing a belt and belt loops? Well, I plan to wear it tied behind the coat, and my thinking is that the contrast black belt would cinch in the back and help create a flattering line. And, if I decide I don't like it, it's simple enough to remove. :)

The following list details my alterations as well as my construction notes:

  • Removed some of the shaping from the front and back side seam at the hip. After the outer shell was constructed, I further tweaked the side shaping by removing about 1/2" from the waist at the side seam (for a total reduction of 2").
  • Narrowed the shoulder about 1".
  • A Princess FBA on the side panel. I followed the instructions in the Palmer/Pletsch Fit for Real People, page 151, Adding to the Side Panel, which are excellent!
  • I shortened the sleeve 1-1/2".
  • Various reviewers on Pattern Review have mentioned that the pocket is small. The pocket is ridiculously small. I think this was intentional – the pocket is inserted into the front princess seam, so they probably thought it was better to make the pocket small, so when the wearer has her hands in both pockets and the coat is closed, the hands won't "overlap". Me, I don't care. I redrafted a considerably larger pocket.

    Their pocket laid over my pocket.

  • I sewed the side seams, the center back seam, and the front and back princess seams with 3/8" seam allowance to give myself extra room. I tapered to a 5/8" allowance at the neckline and armhole so the collar and sleeves would fit without problems. Of course, I did this on the lining as well as the outer shell.
  • The instructions have you interface the entire front with sew-in interfacing. My fabric was quite beefy, so I didn't bother.
  • The instructions have you interface one layer of the collar and stand with sew-in interfacing. I used fusible. I did interface the outer collar, as directed, and but I also interfaced both the outer and inner collar stand, because I want the collar to really stand up and not become floppy over the life of the coat.
  • The instructions call for 3/8" top-stitching. I don't care for such wide top-stitching, so I used 1/8".
  • The instructions do not mention it, but I graded the seams where necessary – particularly the collar seams. I also allowed for the turn of collar, also not mentioned by the instructions.

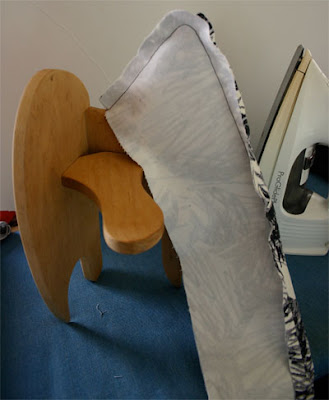
    One of my favorite pressing tools, the Tailor Board, by June Tailor. No longer being made, you can still track these down and it's worth every penny. All the various edges let you press every little corner or curve you might ever encounter.

    A well tailored collar is a joy forever... or at least a joy when you wear the garment. :)

  • I made sleeve heads from muslin and Pellon fleece. I also used 1/4" shoulder pads - the shoulder pads were listed as optional.
  • I applied a 1/2" bias binding around the entire outer edge of the jacket and both sleeve hems. This was rather painstaking work, because there were two outer curves, one quite sharp, and an inner corner. The black binding gives the print some structure.

    The bias binding, isn't perfect, but if anyone starts scrutinizing me that closely, I might have to tweak their nose. ;)

  • I narrowed the belt to 2" and made it several inches longer. I used a black pique fabric and channel stitched it to give it some additional body.

    The pique belt with channel stitching completed.

  • I used a single column of buttons, so the closure is asymmetric. I think this is hard to see in the busy print.

What do I like about this pattern? It is well drafted. The princess seams go together well, the sleeve cap has the right amount of ease. Once I did the FBA, I was extremely happy with the fit, especially around the bust and armhole – no gapping whatsoever. I especially like the fact that there is one pattern piece for the front panel and for the front facing, as well as for the side front and the side lining. This meant I had only to apply the alterations once – usually I would have to repeat the alterations on the lining pattern pieces and hope I got them exactly right. This was a huge plus for me. The only separate lining piece is the center back.

What would I change next time? When you attach the lining to the outer shell, there is a 1" pleat at the bottom of the hem for wearing ease, which is what you would expect. But there is no similar pleat at the bottom of the sleeve. I think there should be, so the coat would be easier to wear and the sleeves would look better.

Progress at the end of the July 4th weekend.

By the end of the long July 4th weekend, I had the outer shell and lining constructed. I worked on the coat two or three evenings, but I spent this weekend finishing. The bias binding took me most of Saturday. I finished the coat at 2pm on Sunday (today), then took a nice, long nap. I took the photos, by myself, this afternoon. Can I say how much I love being able to take photos on my own? :)

Buttoned up

Collar up. So dramatic!

Unbuttoned. The general consensus of both daughters is that it's more flattering buttoned and unbelted. :)

Back, with the collar up, and the belt tied jauntily in back.

I know that most of the country, at least east of the Mississippi, is suffering from a heat wave. I wish I could send you some of my weather. Here, it is foggy and chilly – true San Francisco summer weather. I had to lighten these photos because it is rather dark from the fog, even though they were taken at 5pm. This trench coat will get immediate use!

Friday, July 9, 2010

Happy Birthday to Me!

Hmph! My own kids have evidently forgotten about my birthday today, but I did get myself a little gift. I saw this set of books recently in a shop and was amazed at the quality of it. What we have here are two large sized, hardback books, published by the Kyoto Costume Institute about the history of fashion and called, conveniently, Fashion. The two large books slide into a nice quality slipcover. The two volumes cover the 18th, 19th, and 20th centuries, with the second book focusing on designers. The quality of the photos is amazing!

This set would be a deal at $100, and it lists for $60, but I got it from Amazon for $38! If you dropped this set on your foot, you would definitely break a toe or two, but Amazon shipped it for free. Really, if you love costume and fashion, do not miss this book!!! Years from now it will sell for mucho denaro on ebay.

This weekend, I hope to finish my trench coat!

P.S. I don't get anything for recommending this book. :)

Sunday, July 4, 2010

Happy 4th of July!

And, for me, it's a day of sewing. :)

Thanks so much for all the comments yesterday on my Au Bonheurs pants. Who knows, maybe in a few months, after they've aged a bit, I might like them better. We'll see. They did have one great purpose, however. Sewing up that pattern gave me enough justification to order a few more patterns from Au Bonheurs. :)

I ordered three more pants patterns and a skirt pattern. So, stay tuned! I do find that it is getting easier and easier to use these patterns as I get more used to the sewing French that they use. And the instructions are so terse, it's getting pretty easy to translate on the fly, though not, perhaps, that instructive. :)

On another subject, I have been wanting to make a trench coat for the last month or two. It's funny how an idea can seep into you, seemingly from nowhere. I'm not sure where the idea originally came from, but now, everywhere I turn, I see trench coats. Yesterday, I went into Neiman Marcus for the first time in a gazillion years (they are across the street from Britex, but I normally never enter) and I saw trench coats galore. I also saw Eskandar clothing up close for the first time. Drool.

Anyway, seeing those trench coats at Neimans really got my obsessive sewing juices flowing. I went back to Britex and bought some hardware for the trench. Last night I pin fit the pattern tissue, and compared the FBA princess technique in Fast Fit by Sandra Betzina to that in Fit for Real People by Palmer/Pletsch. There is no question that the Palmer/Pletsch approach, while more involved, will yield a better result, since the Betzina approach adds only length, not width, and doesn't affect the armscye at all.

Then, this morning, I rushed off bright and early to Fabrix to find some lining and piping fabric for the trench project. (One of the coats at Nieman's piped their coat with a very nice, malleable, vinyl fabric. I couldn't find anything like this at Fabrix, but I found a fabric that should work.)

So, I need to do the FBA, make a muslin, and get going on the real fabric. I'm itching to get off the computer and get started. :)

One of my kids is in New Jersey, and the other in Boston, (both were just in Nantucket, but have headed in different directions with different relatives), so I can really focus on sewing. I hope everyone (who celebrates) has a great 4th!

Saturday, July 3, 2010

Au Bonheurs des Petites Mains - Pants with Bottom Bands

I've been in a pant sewing frenzy lately, and I'm loving it. My poor skirts have been completely neglected in favor of making, and wearing, pants. The French pattern company, Au Bonheurs des Petites Mains has some very interesting pant designs. I decided it was time to try another pattern, so I pulled out PLH08003, which comes in sizes 36-46 and 48-52. (At least, I assume the larger pattern covers the size range 48-52, because I have the smaller pattern and it definitely includes size 46, though the web pages says it goes to size 44.)

This pattern has center seams, front and back, so there are four primary pattern pieces: center front, side front, center back, and side back. The waist is finished with waist facings and closes with a front zipper. A band attached to the bottom of the pants is sewn partway into the front and back seams. The pants are evidently intended to be cropped, based on the length of the pattern pieces, though the description doesn't mention this and you can't tell from the garment photo on the pattern.

As I traced off my size (46), I made the following changes:

  • I lengthened the pants 3", between the knee and the ankle, to make them full length.
  • I overlaid the Trio crotch/waist onto the pattern. The crotch curve from the original pattern is designed for a very slim, very small, young bum, and is low waisted. I raised it to my preferred waistline, and increased it so I could avoid a zipper.
  • I omitted the waist facings.

It's a fairly easy pant to construct, the trickiest bit being the bottom band and, on that score, the pattern is rather terse. (It gave better instructions on how to finish the waist, which is much easier to figure out.) Since I changed the waist and omitted the zipper, I used a slightly different construction. Here are the steps I used. If you are using a zipper and waist facings, follow the construction you would normally use, placing the zipper at center front, and interfacing the front (5) and back (6) waist facings before attaching. The band is attached after the legs are formed.

  • Sew the side front (2) and the center front (1) together, stopping at point A. Press the seams open.
  • Sew the center back (3) and the side back (4) together, stopping at point B. Press the seam open.
  • Sew the side seam of each leg.
  • Sew the inseam of each leg.
  • Sew the short ends of each band together, forming a loop.
  • Attach the band to the bottom of each of the pant leg placing the seam of the band at the inseam of the pant. When you come to the center front (or center back) seam, turn the band around the corner (you need to snip the seam allowance of the band to turn the corner), and continue to stitch up the center front (or center back) seam, stopping at point A (at CF) or point B (at CB). Break the thread, turn, and resume stitching back down to the hem. Turn at the corner (snip to the seam allowance again), and continue stitching along the hem. Attach the band all around the bottom of each pant leg in this manner, so that the band is stitched into the center front and center back seam, to point A and point B.
  • Attach the legs by sewing the crotch seam.
  • Finish the waistline using your preferred technique.
  • Hem each leg.
  • VoilĂ !

I admit I was on the fence about the pattern before I made these pants, but, in the spirit of adventure, was willing to give them a try. Now that I've made them, and photographed them, they are too fashion forward, even for me. Yep, I don't like the bands at the bottom. If I were to make them again, I would also tweak the fit to remove about 4" at the hips. Oh well, they will be fine to wear around the house. :)

I lightened the photo so you can better see the hem detail.

Tuesday, June 29, 2010

Sewing Workshop - Ikina Jacket, Salsa Top (#4), and Tilton Pants

It's high time I made myself an Ikina jacket. I have seen numerous sewists who sing the praises of this jacket, which is reminiscent of a cropped kimono, but for some reason, it didn't bubble to the top of my pile, partly because I didn't seem to have the right fabric on hand.

Recently I bought 3 yards of a very yummy poly/cotton/lycra brushed twill from FabricMart. Originally, I wanted to use this fabric for the Sandra Betzina jacket, but when I realized that pattern wasn't working for me, I reallocated the fabric for the Ikina.

I.love.this.fabric. One side, as shown, has a brushed surface and looks sueded and the other side is slick and shiny, so it feels as if it's self lined. It has a lovely, weighty drape and a rich, warm color. The only downside is that it doesn't want to hold a crease, so I ended up topstitching every seam and every hem. Luckily, I love to topstitch and this fabric loves to be topstitched. :)

I made three changes to the pattern:

  • I eliminated the side vents.
  • I lengthened the jacket 3". This meant I also added 6" to the front band.
  • I added a hanging pocket.

What I did not do was an FBA. I decided I didn't want to. I like this jacket as designed; I knew it would be large enough (I made an XL), and I liked the hemline a bit shorter in front. For this jacket, anyway. :)

I had been warned about one tricky aspect of this pattern – the bias front band. At least in some "wobbly" fabrics, this can be very tricky to construct. A sewist friend who has made this jacket multiple times reported that you can achieve a perfectly good result with a straight-of-grain front band. And, of course, in a knit, a bias band is not necessary. However, I really wanted to use a bias band because I like how it lays around the neck and forms a small fold-back collar (if you want to wear it that way).

I diligently followed the instructions for ironing the bias band to remove some of the stretch and to form the curve it will have on the final garment. The band is folded in half, the long way, before creating the shaping. I basted along the folded edge to keep it in place. You then trim the band to 3 5/8" wide. I marked 3 5/8" and then basted just inside the marked line.

Trimming the front band. The shaping has been applied.

My thinking was to treat the folded band as a single piece – to sew it to the jacket in one go, then trim the seam allowance to 1/4", overcast the raw edge, turn it towards the jacket (away from the band), and to topstitch. I was hoping that this would help avoid some of the problems other sewists have reported when they follow the directions, which tell you to sew one edge of the band, then turn the raw edge under and hand stitch that edge to the inside. This is tricky with bias, at least on an unstable fabric.

Well, the final result was ok. It could have been neater, but it's fine so long as no one scrutinizes it too carefully. :)

I am wearing the Ikina with my new Marcy Tilton pants (Vogue 8637), made using cream ponte I bought from Marcy Tilton.

I am not too crazy about the excess fullness at the shoulder. I'm not sure how to tweak the pattern to fix this.

My hand inserted into the spiffy hanging pocket that I added.

Hanging pocket, up close. I sewed one side into the side seam. I think you can make out the stitching at the upper left edge that anchors the pocket to the jacket.

The final item in this ensemble (and yes, I made these pieces to go together) is a Sewing Workshop Salsa blouse. This is #4 of this pattern for me. This time I made it using an Anna Sui cotton/rayon voile from FabricMart. This fabric was sold by the panel, and I fell in love with it, but decided to use it as a border print.

I purchased three panels and was able to just squeeze out this top. I changed the grain to put the front edges along the border stripe. I also put the sleeve hems along the border stripe and, yes, I intentionally cut them to use the stripe asymmetrically. This is the 4th time I've made this top but the first time I've actually finished every raw edge, using either French seams or flat felled seams. It just seemed the right thing to do with this very fragile handkerchief-weight fabric.

When the top was complete, I tried it on and it didn't fit! I quickly realized the reason – this was the first time I'd used a woven for this pattern. Twice I'd used knits and the third time a stretch woven. The top was tight across the waist, but fit me otherwise, so I added little flanges at the sides. The fronts now button to the flanges, instead of the back. This gave me an additional 3" in the waist and it's now perfect!

The flange, with the buttons sewn to the edge. This fixed the problem where it was too tight at the waist.

And, if you are observant, you will notice that this fabric has polka dots woven into it!!! swoon! :)